Russian Honey Cake
I spent 3 active hours on this cake, and it’s not even anybody’s birthday.
For years, I heard so much about this cake and even considered making it a while back after some recipes surfaced online. But it was a lot of work to make an “adapted” version of something I’ve never tried before. I don’t even know what I’m missing, so why bother?
But with the recent release of the 20th Century Cafe cookbook, and our pastry chef friend’s testimonial that the recipe is true to original, I decided to go for it. My old coworker sent me some screenshots from the book months ago, and I finally got to it now - the holiday cookies took up a lot of my mental energy and physical strength for a while, and before that, Thanksgiving dinner. But January in the middle of a long pandemic is as a good time as any for this weekend project.
In fact, in the book, she says it’s best to make for yourself, for no occasion at all, since it’s a lot of work to make it for somebody else.
It really is a project. But it’s not hard, and not as much work as it sounds. Just be ready to dedicate three hours of attention and literally all your available counterspace. It’s not really something you can work on in conjunction with another task. Read the instructions carefully before and during, and take your time to do it right.
20th Century Cafe’s Russian Honey Cake
Day 1: Make burnt honey and dulce de leche from condensed milk.
Day 2 (the big day!): Make cake layers, make frosting base; make frosting and assemble
Day 3: Eat! Share, maybe? Because the cake is supposed to serve 16 lol.
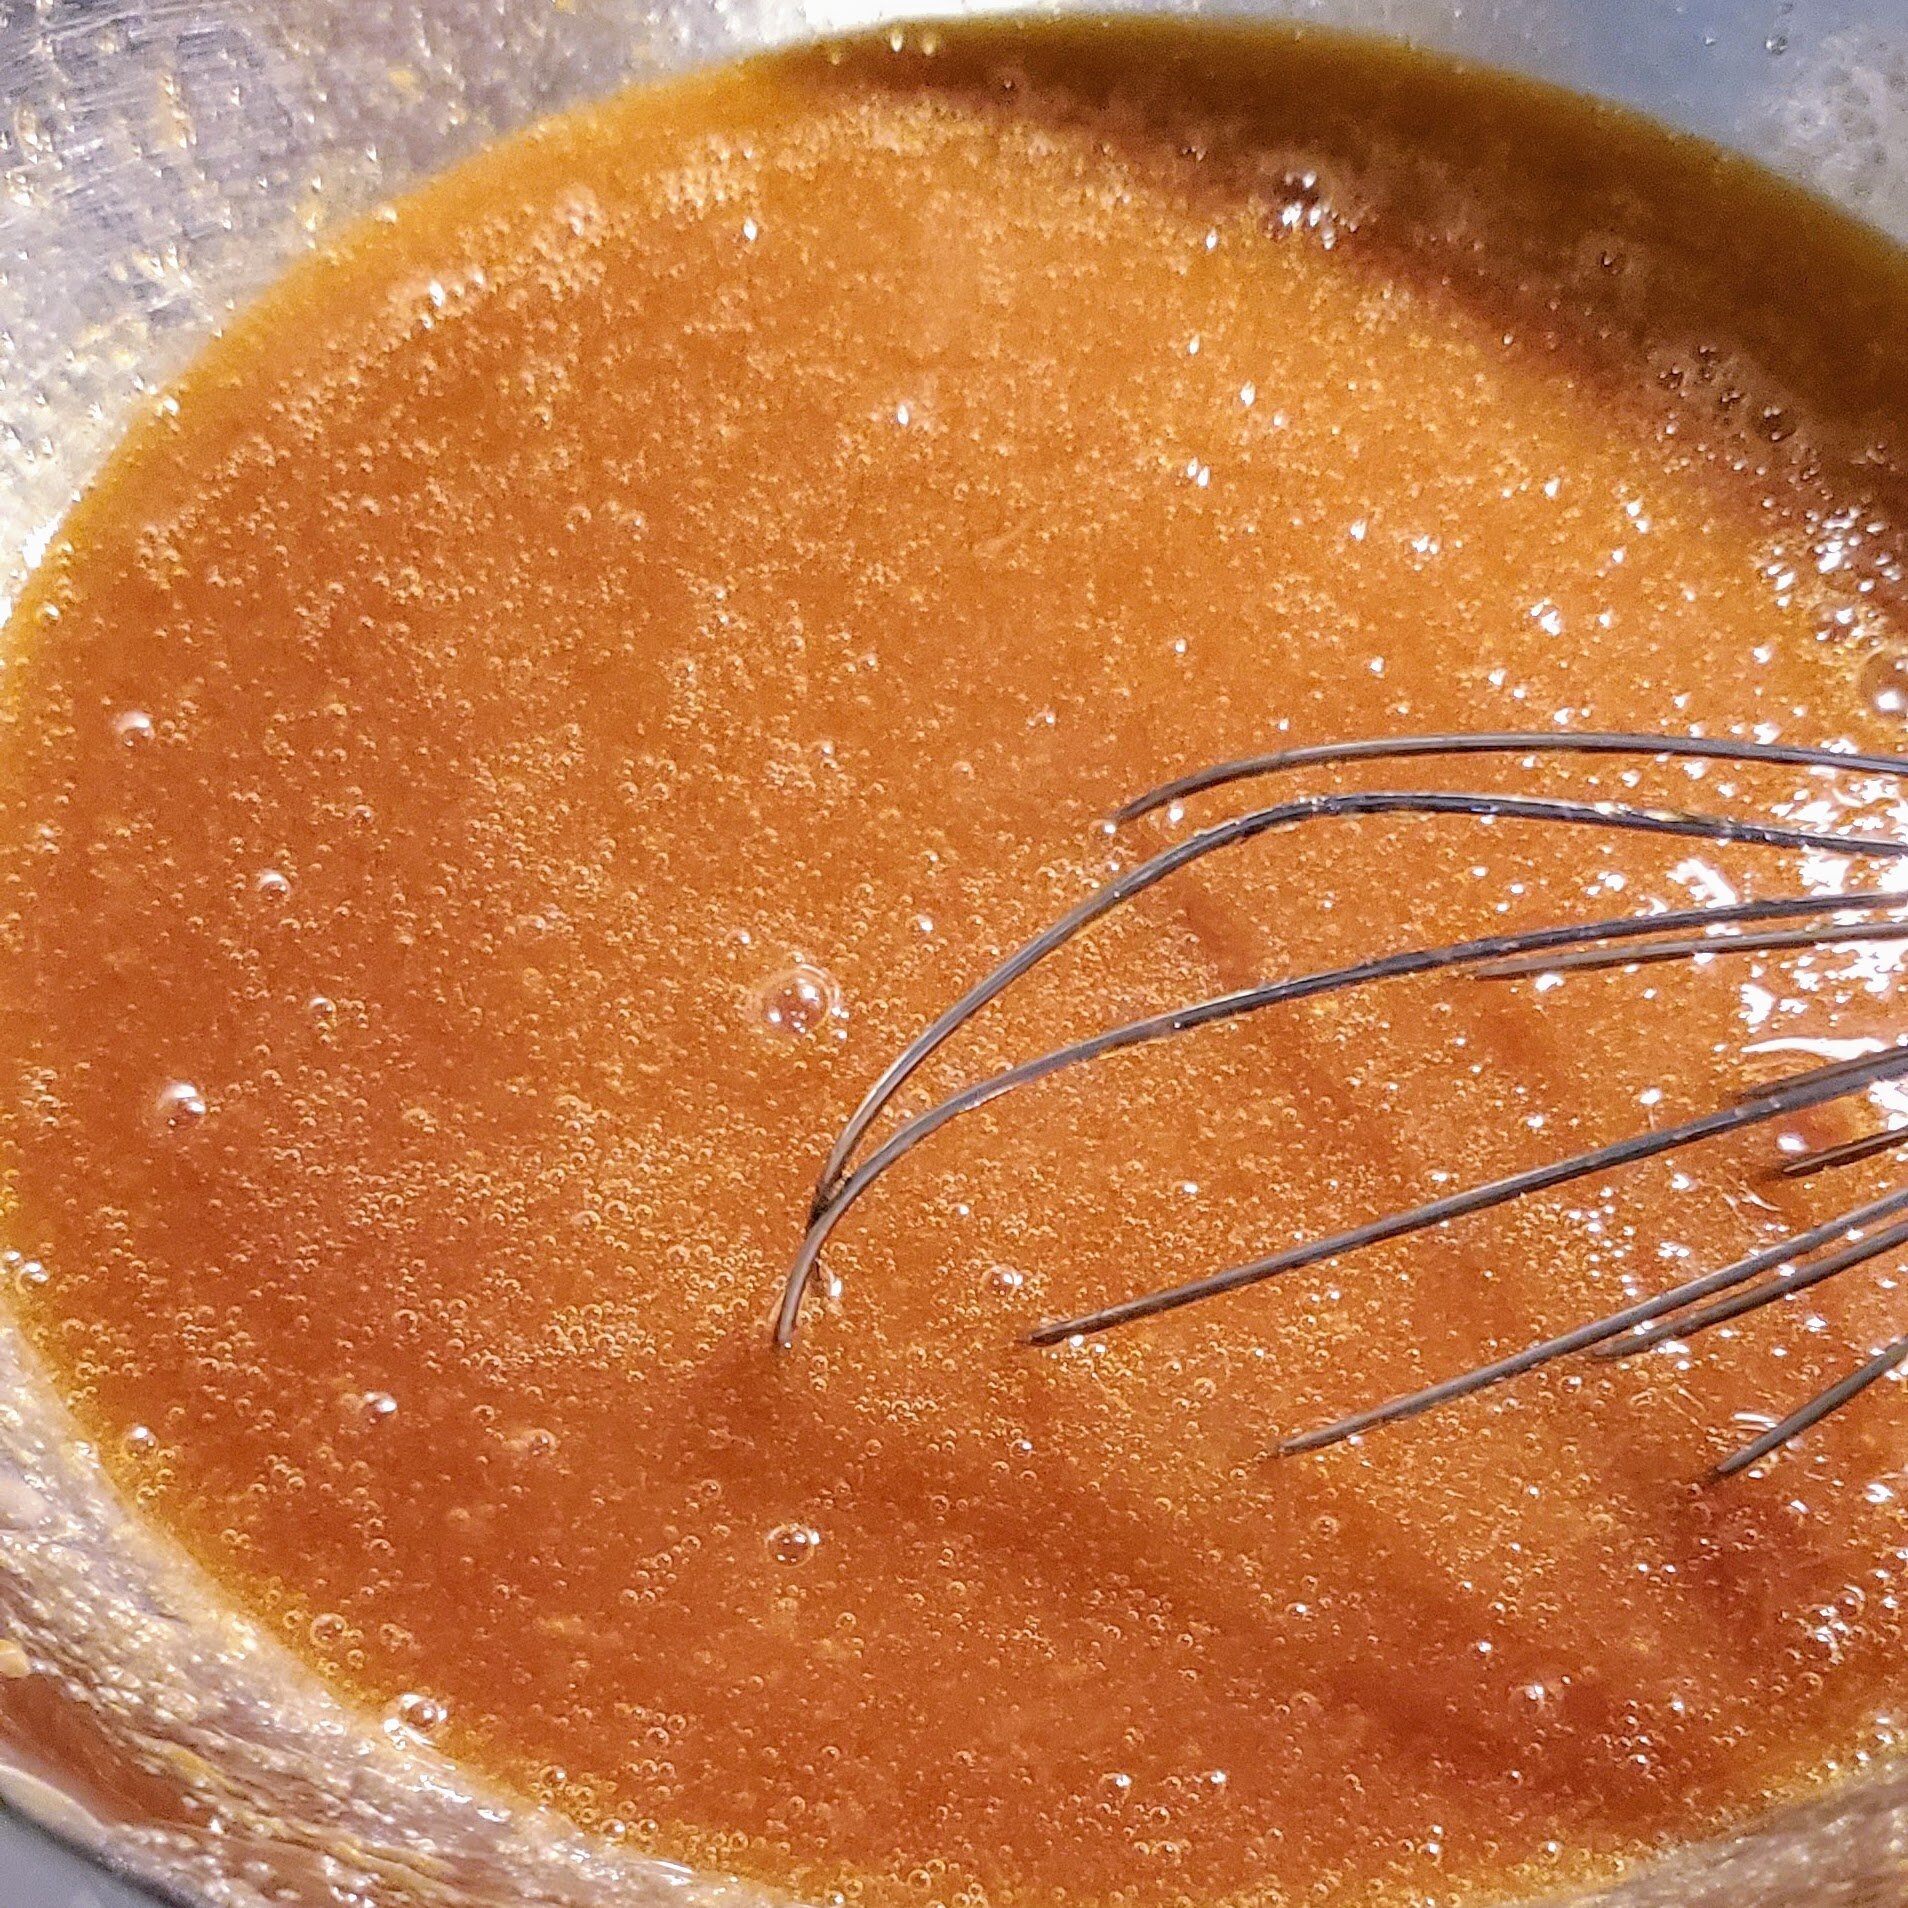
Make burnt honey:
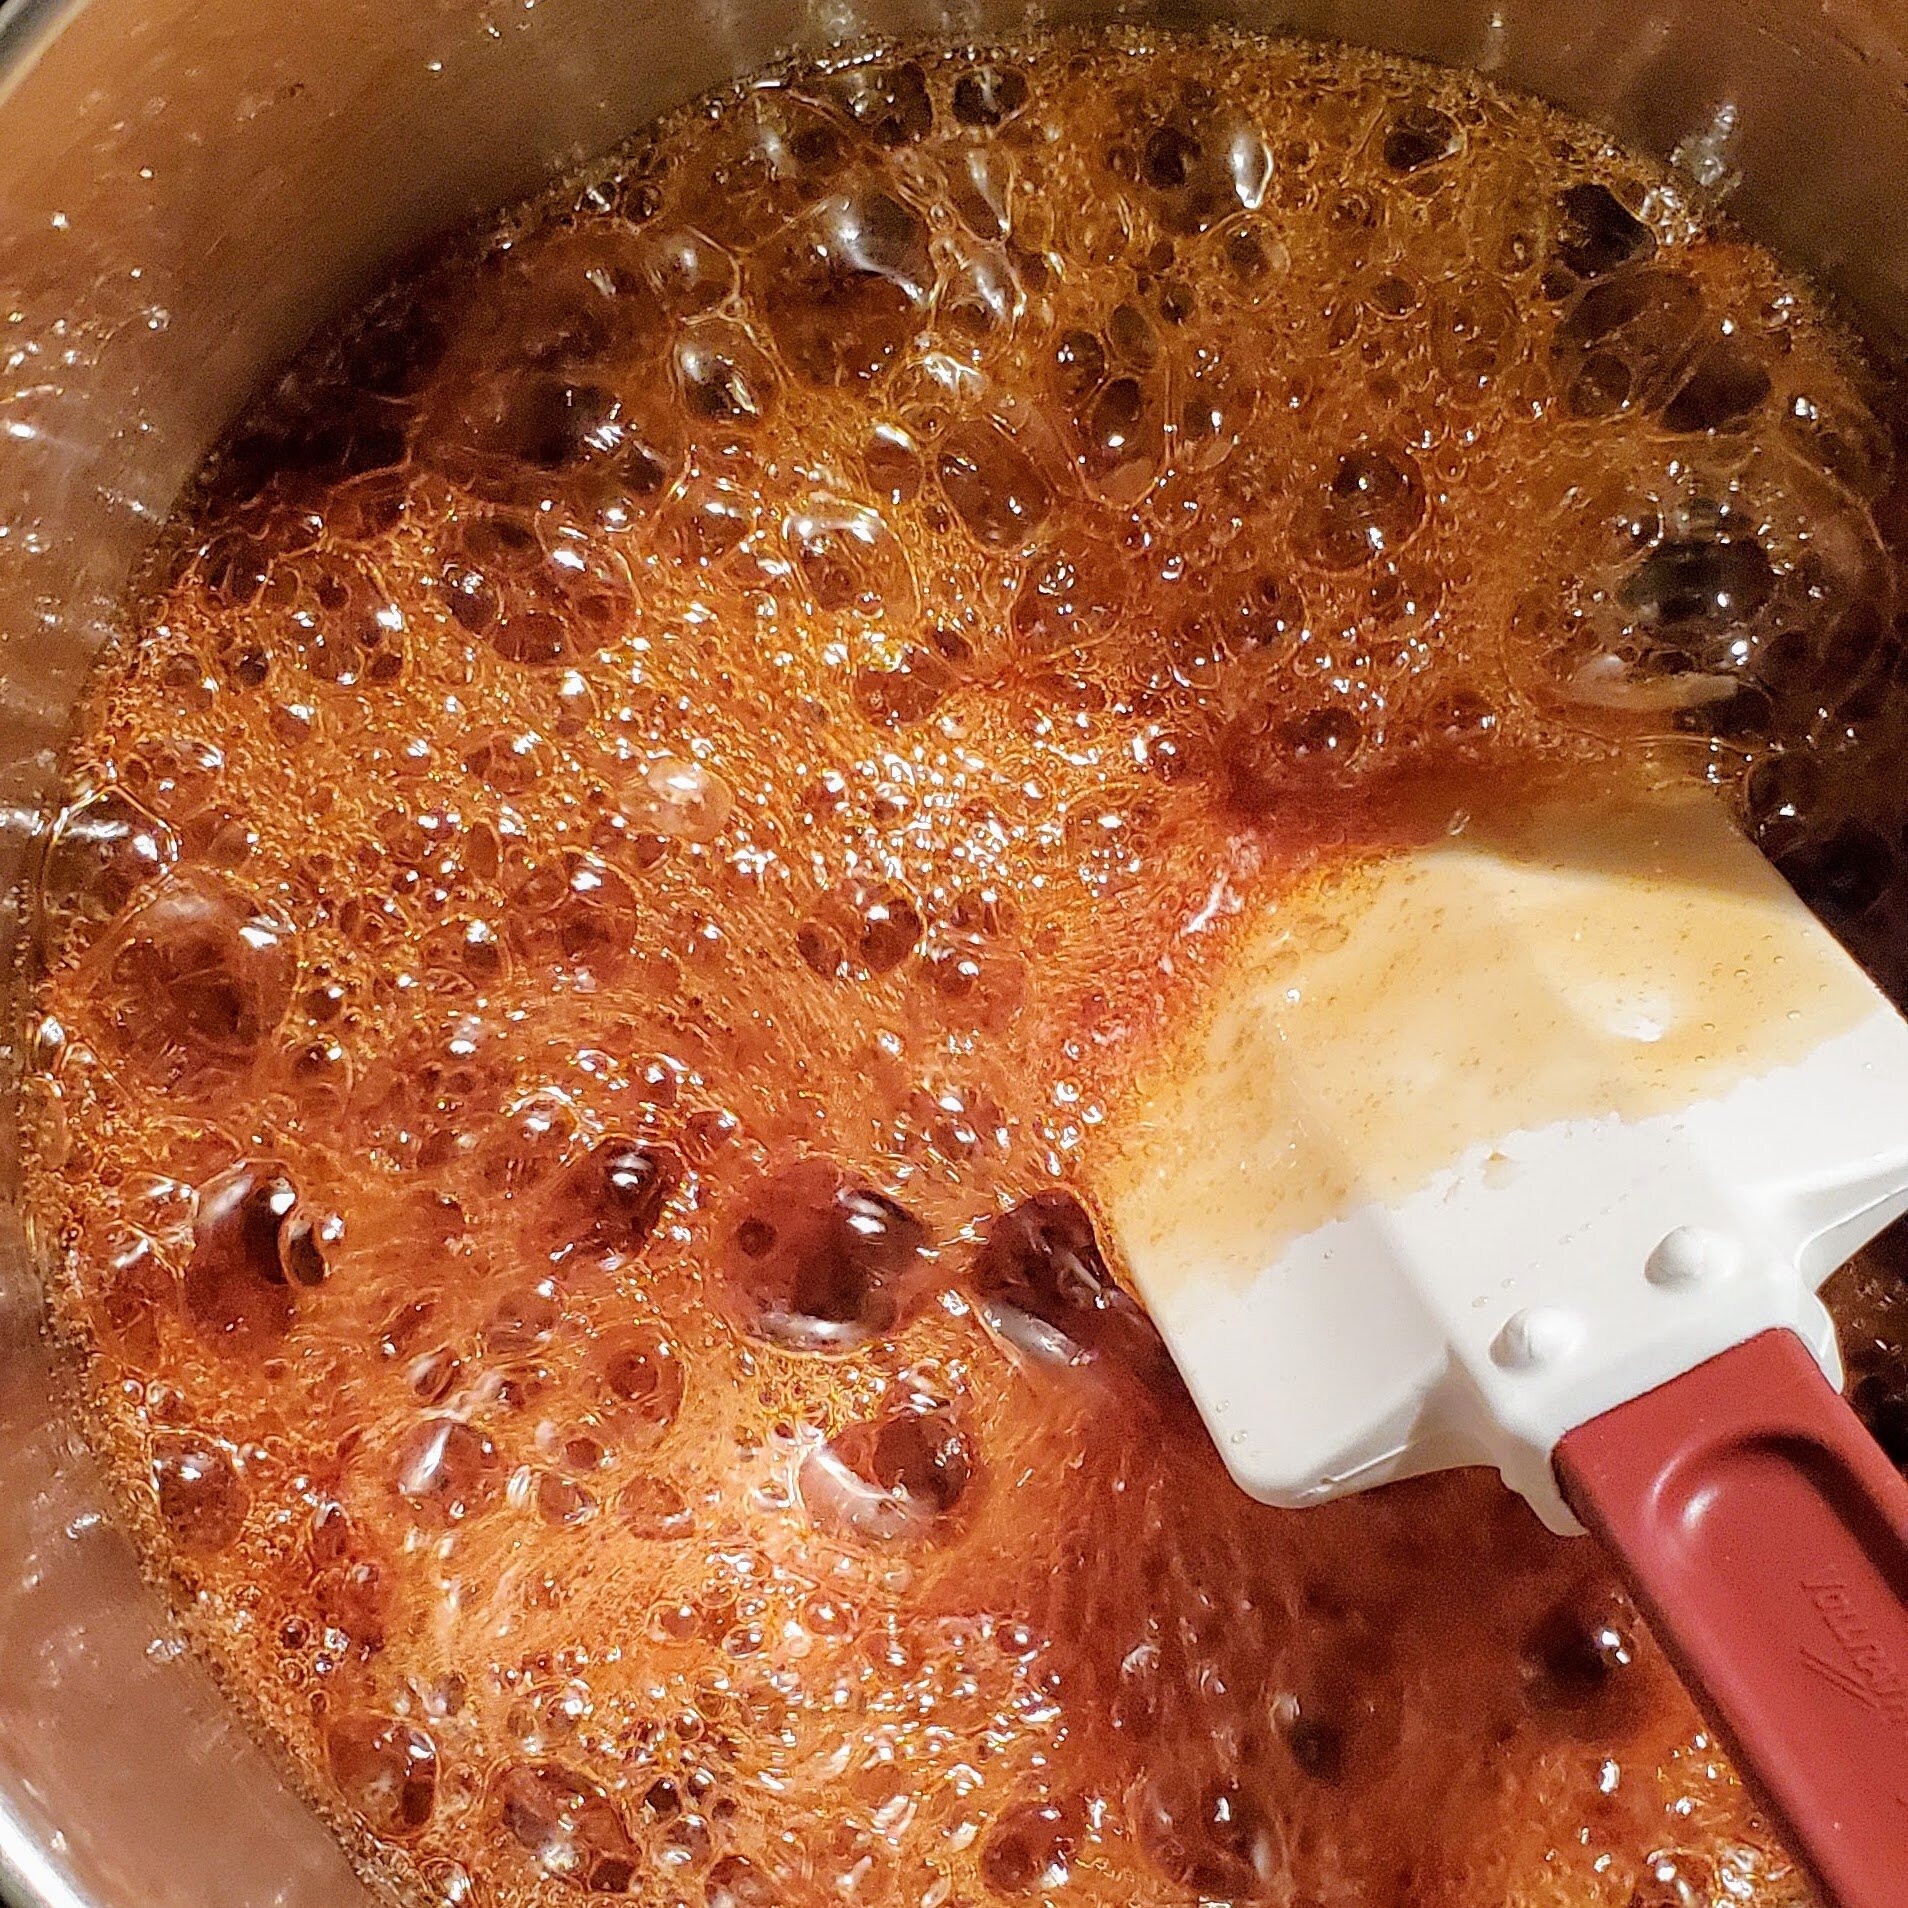
In a 1.5qt saucepan, bring 200 mL wildflower honey to a simmer over medium heat.
The honey will foam up a lot at certain stages, so stir often.
Keep simmering and stirring as it turns darker in color.
Once the honey starts to smoke, reduce the heat to low and cook for 30 more seconds.
This step is pretty crucial! It will smell a little dark, but my previous attempts at burnt honey were not as remarkable, probably because I didn’t properly “burn” it.
On an electric stove maybe lift it up from the heat for a few seconds at a time while stirring constantly.
Remove from the heat, and gently swirl the pan for about a minute to dissipate some of the heat.
Set the pan down, step away, and pour 2 Tbsp (30g) cold water.
Do not try to pour while holding the pan!! The steam released + the crazy bubbles will burn you. Put the pan down and step back.
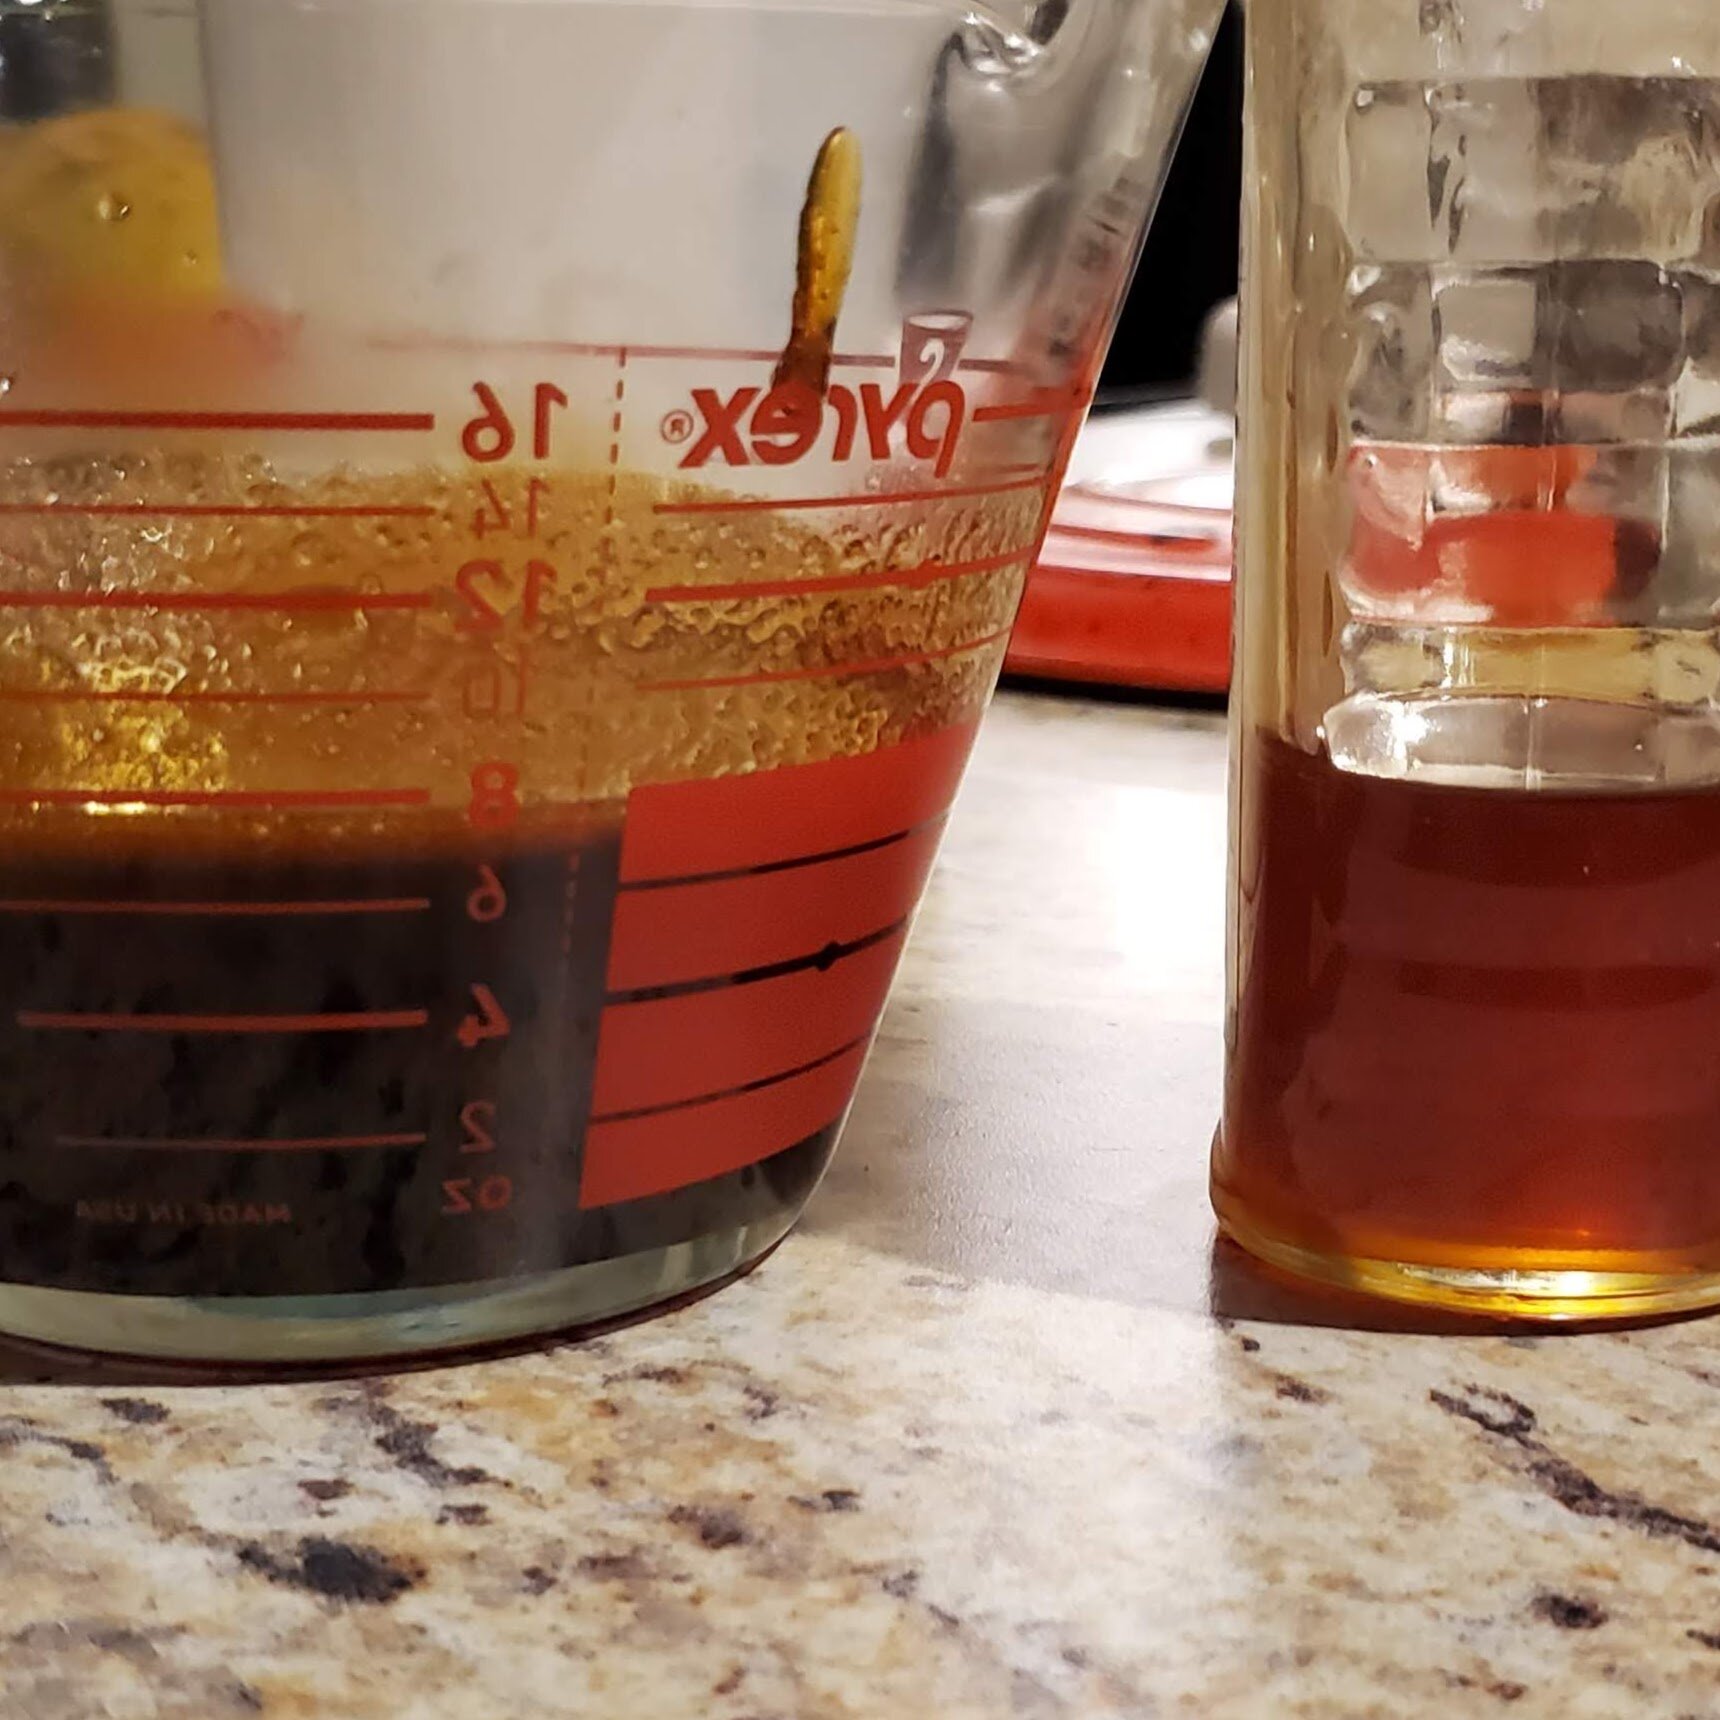
“Once the honey stops bubbling like it’s going to kill you,” transfer to a heatproof measuring cup.
Add enough hot water to make 200mL (3/4 cups + 2 Tbsp) of honey again.
Store, covered, at room temperature until ready to use. It’ll keep indefinitely.
Make dulce de leche from condensed milk:
Put a 14-oz can of sweetened condensed milk (or several, because you might as well make a lot) in a tall-sided pot.
Add enough water to cover the cans by at least 1-inch; more would be better.
Bring the water to a gentle simmer, and cook for at least 2 hours for a light butterscotch, or 4-5 for something darker. (The book says to do 7-9 hours, but that seems very extreme?)
In the past I generally did about 4 hours for a nice deep caramel-colored dulce. This time, I only had time to cook for about 2.5, and it was a little too light.
Keep an eye on the pot, and add more hot water regularly to keep the cans covered.
DO NOT let the water fall below the top of the can. Always keep the cans completely submerged in water. If not, the cans will explode. Luckily this has never happened to me, but I have heard some horror stories.
Completely cool the cans before opening! Same thing, the pressure from the heat will leave you with burns from splatters of hot milk jam.
I recommend doing the dulce while there’s other cooking going on, so you can keep an eye on the pot to make sure it doesn’t suddenly boil down too quickly. You can also just buy a can of dulce from the store.
Alternatively, I read online you can cook the cans with an immersion circulator at 85C for 12 hours though I never tried it. But similarly, still keep the cans completely submerged in a ton of water, and completely cover the top of the water bath to prevent evaporation.
Making the cake:
The cake itself is pretty easy, but very time consuming.
Preheat the oven to 375F.
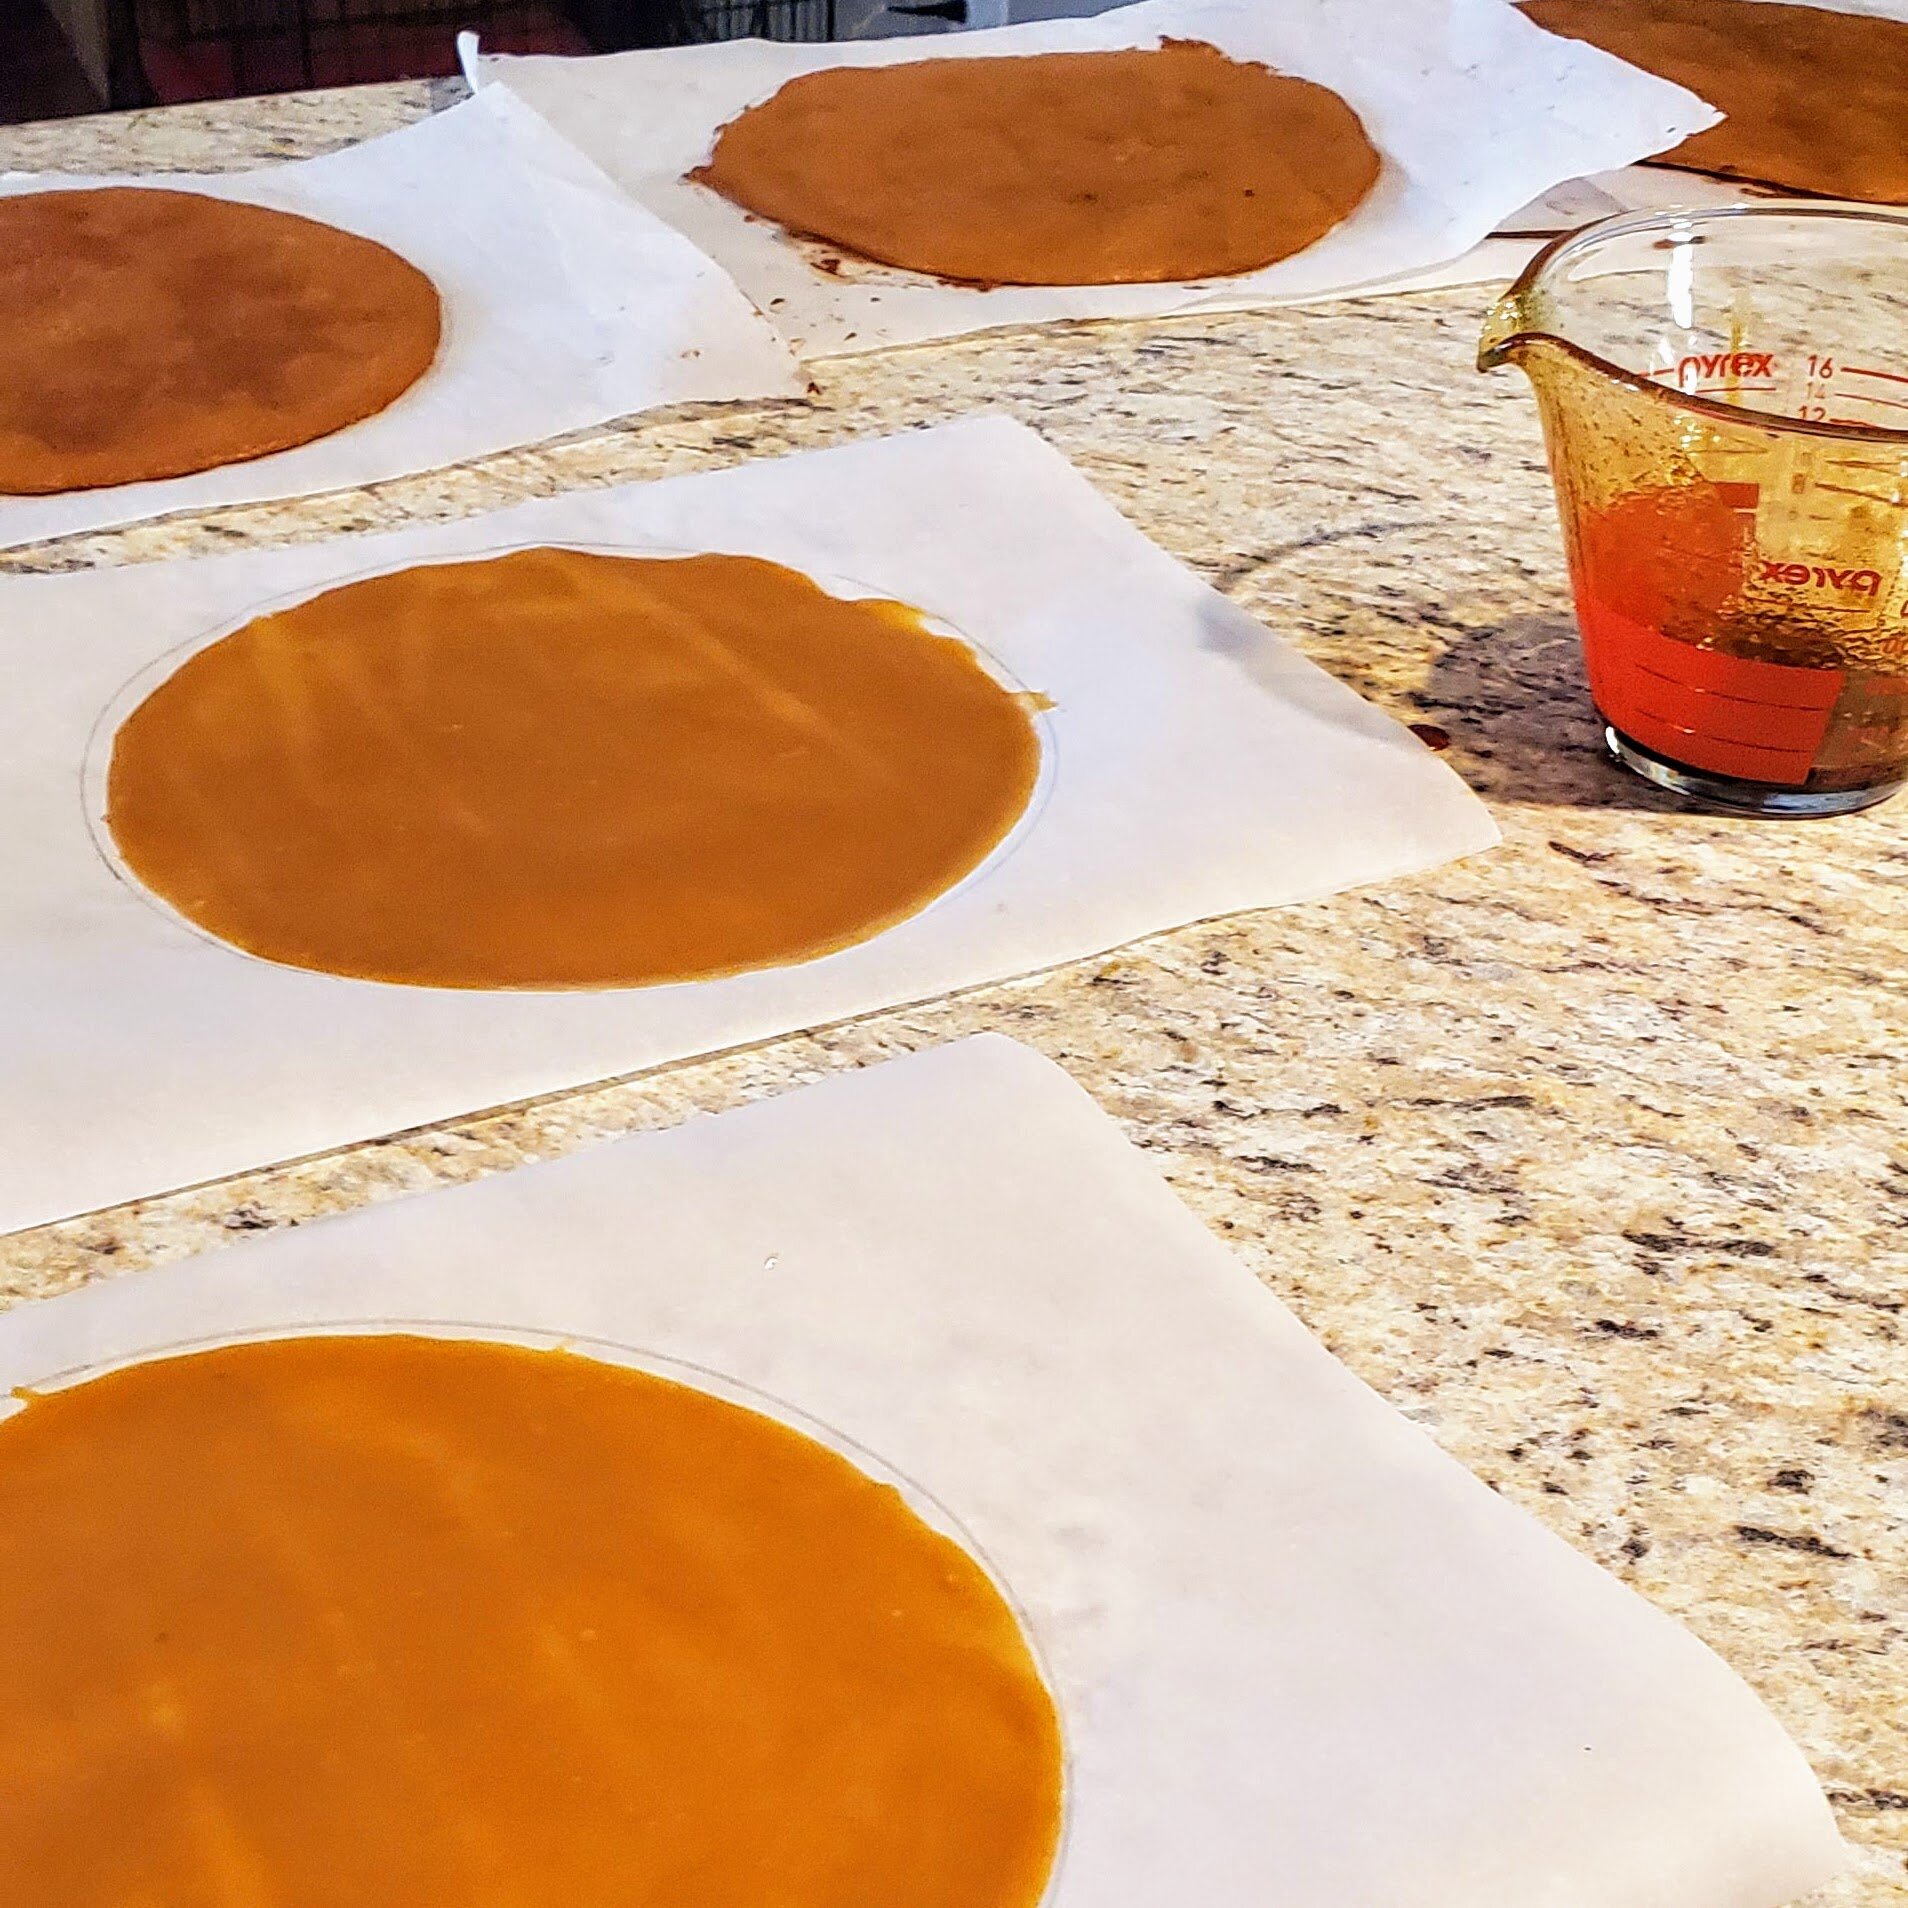
Prepare your parchment: Cut 11 sheets of parchment paper for a half-sheet tray (11” x 17”, about). Using a dark marker, trace a 9-inch circle with the bottom of a cake round. Flip the sheets over.
If you’re stuck with rolls of parchment like me, trace it with the paper curling up toward you, so when you flip it and put cake on it, the weight of the cake will keep the paper flat.
Choose a medium-sized mixing bowl and a pot that it can sit over to make a double boiler set up - I had to use my 6-qt pot.
In the mixing bowl, add:
50 mL burnt honey (from above)
150 mL regular wildflower honey
165g sugar
168g unsalted butter, cut into pats/cubes for easier melting
Cook while constantly whisking over the double-boiler until the butter is melted, and the mixture is hot to the touch, but not so hot it burns you.
Add all at once, while whisking constantly:
5 large eggs
Cook until mixture is hot to the touch again. Then add:
1 3/4 tsp baking soda
1 1/4 tsp kosher salt
1 tsp cinnamon
Take it off the heat, and whisk in:
2 Tbsp cold water
Let the mixture cool until warm, but not hot. (This only took about 2-3 minutes for me.)
Sift over the mixture:
360g AP flour
Whisk until the batter is perfectly smooth. Do not worry about overmixing.
To bake:
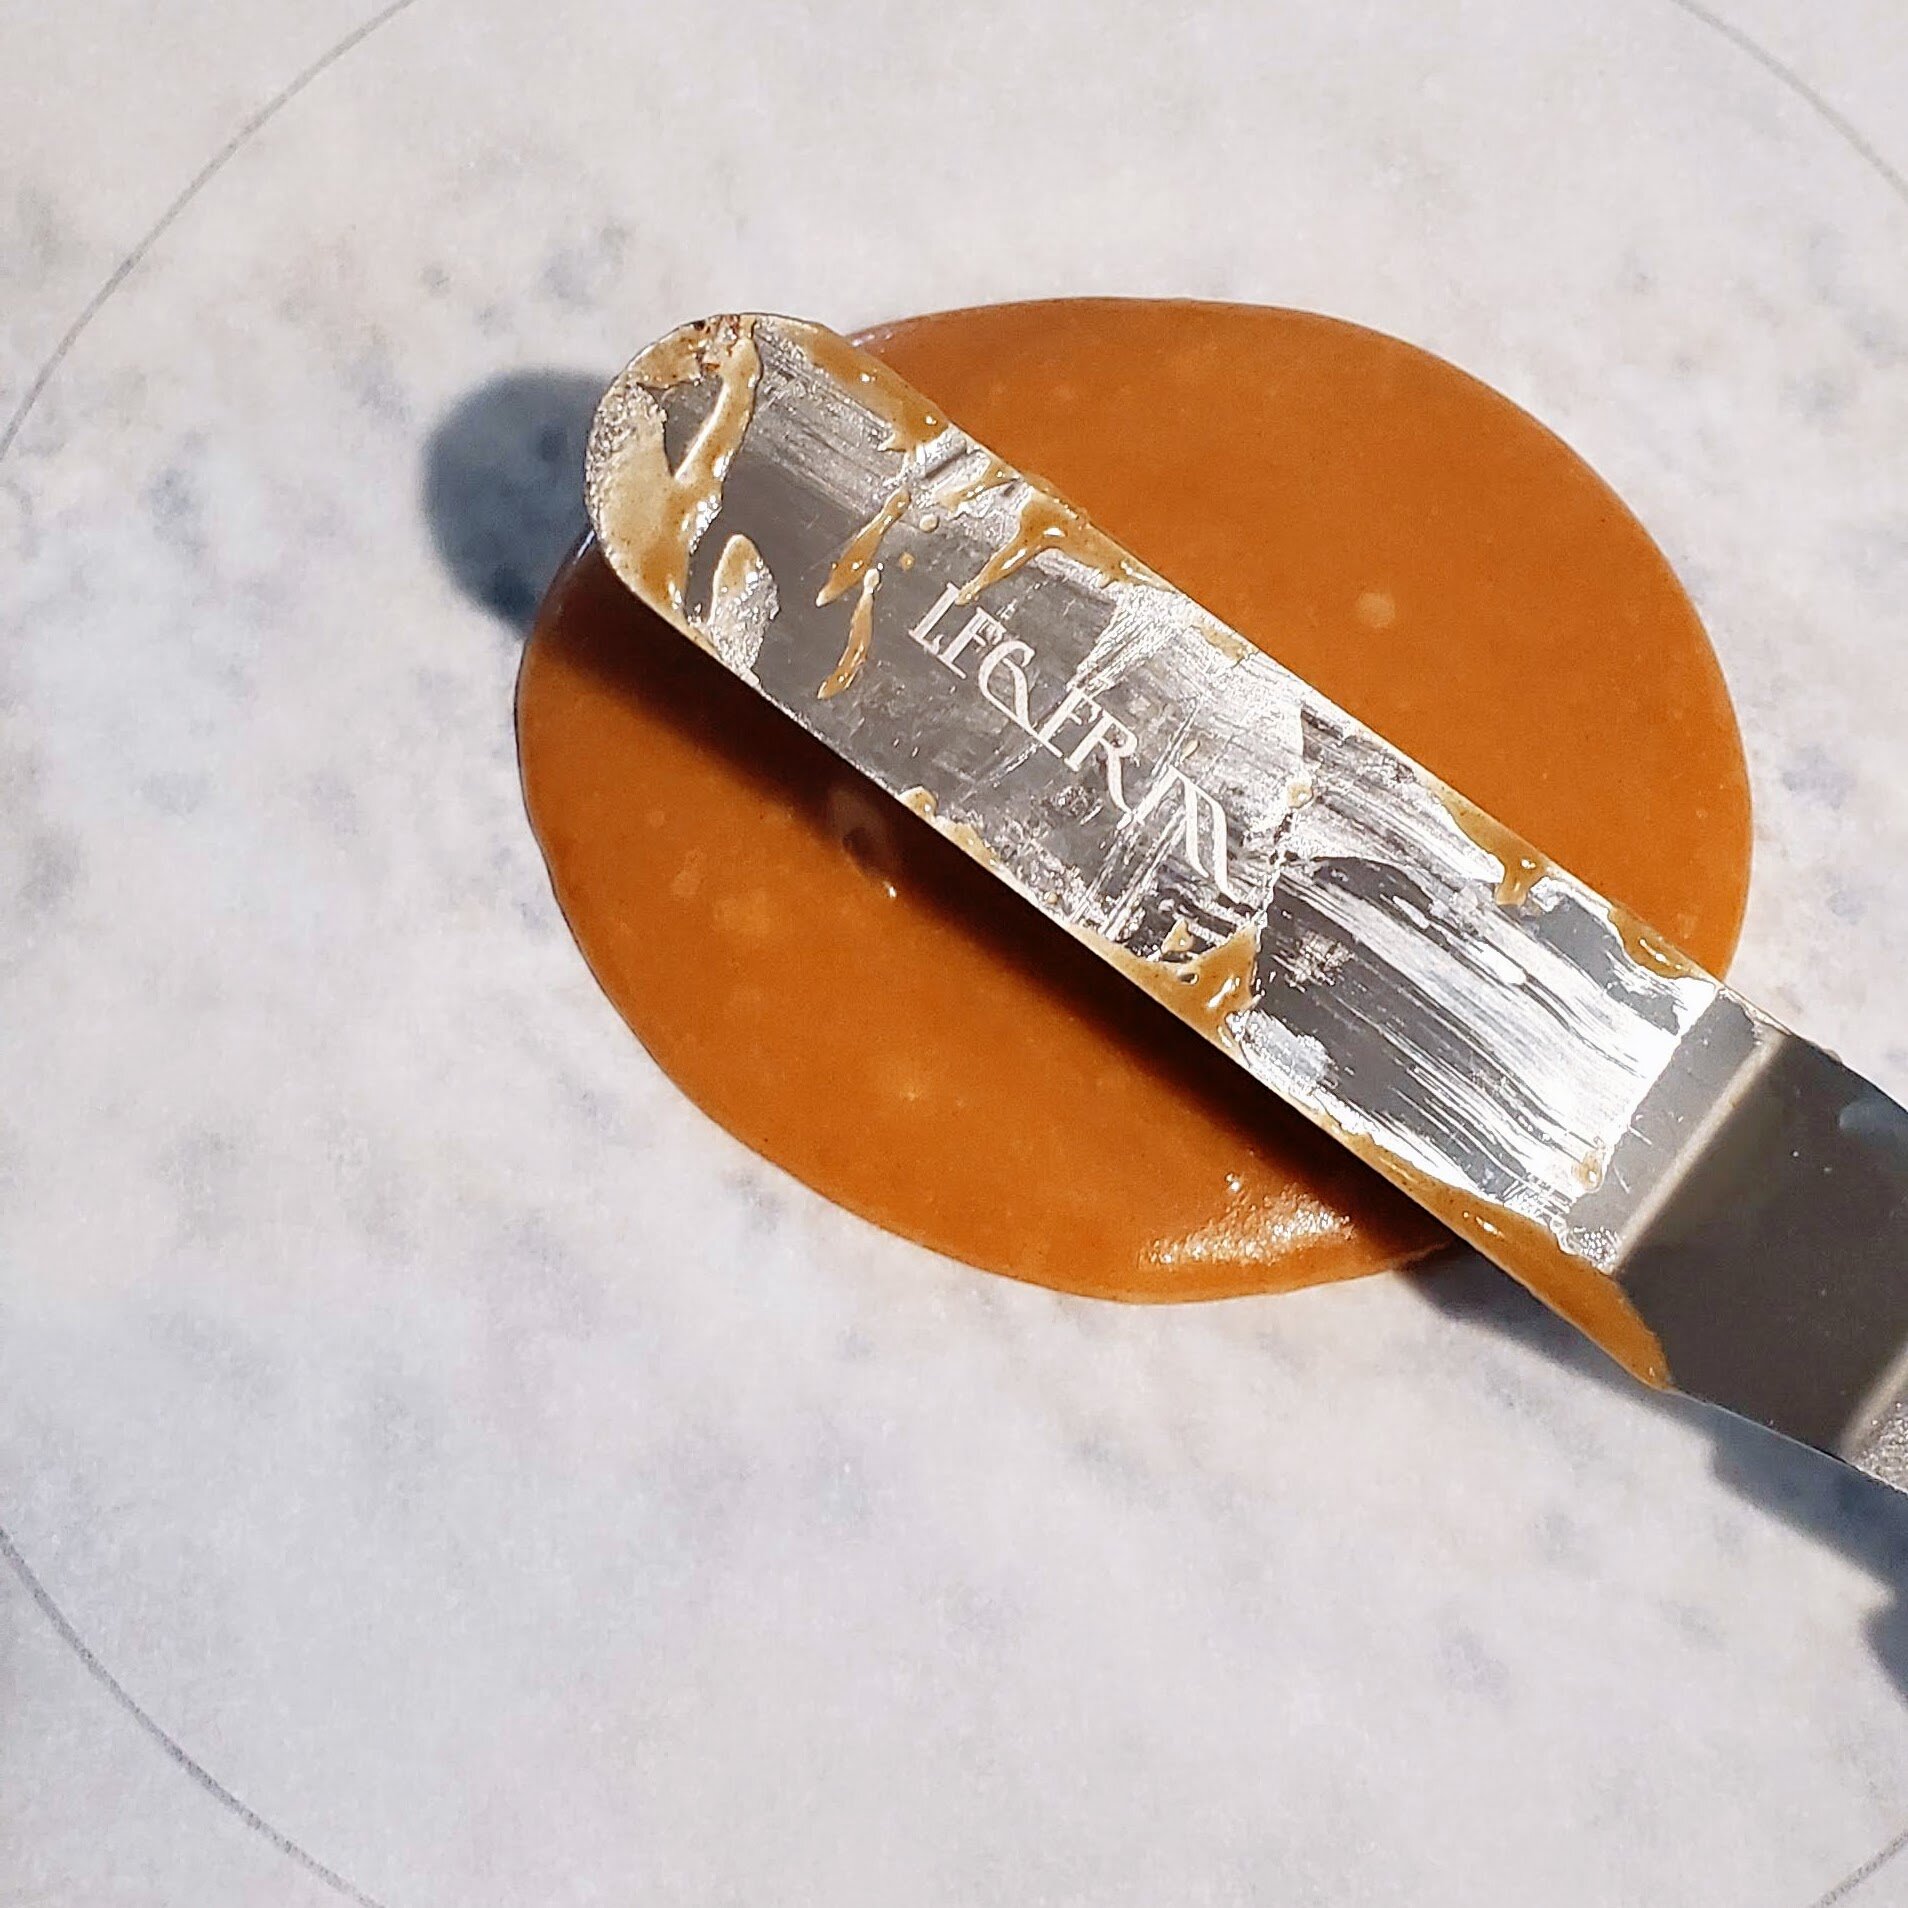
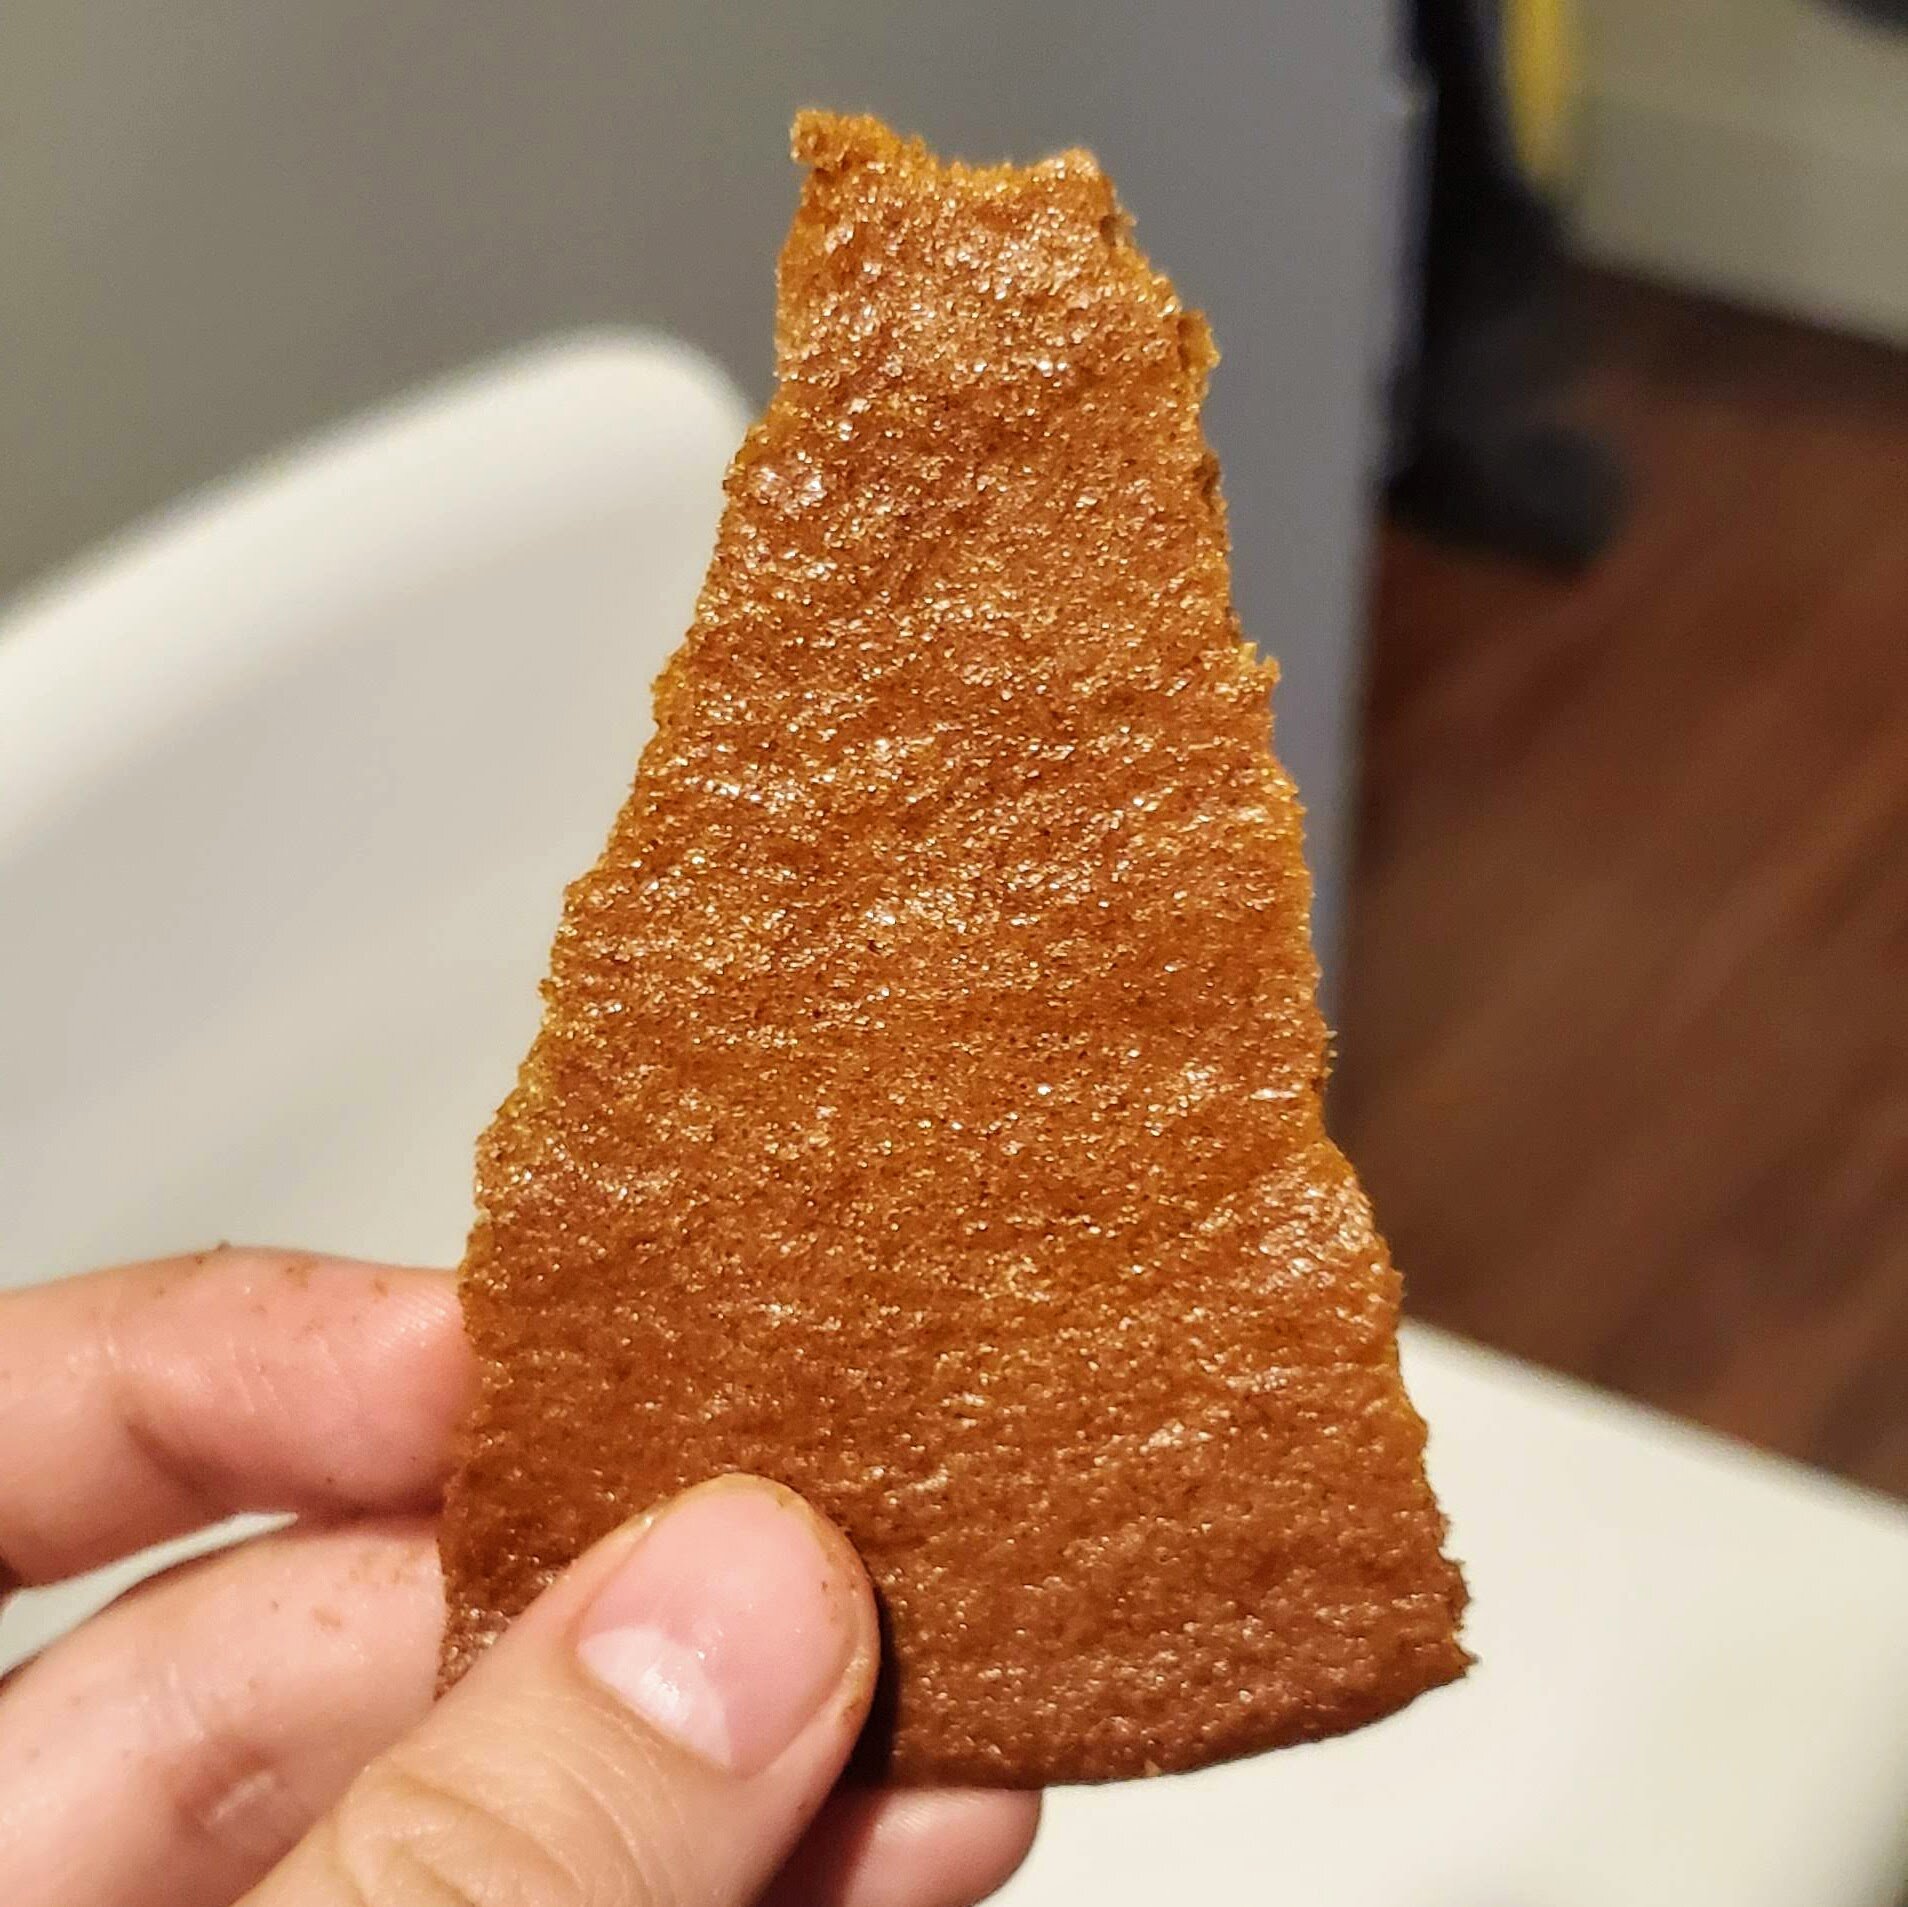
Scoop a heaping 1/3 cup (2 heaping red scoops for me) of batter onto the center of the circles.
I think the book’s measure of 1/3 cup is a little thin, and gave me too much leftover batter. A heaping scoop per layer will still yield 11 rounds.
Spread with an offset spatula into a thin and even circle. It will seem super duper thin.
It’s easier to use a bigger offset spatula than a mini one.
Keep your spatula still at a good angle for pushing while you use your other hand to rotate the paper. Once you’ve gotten batter all the way around, use a second spatula to scrape batter off your spreading spatula, and do some minor spreading to even it out if necessary.
If the batter cools too much and becomes hard to spread, just return it to the double boiler for a minute and give it a quick stir to distribute the heat.
Bake in the oven, 1 sheet at a time, for about 6 to 7 minutes. Rotate halfway if necessary for even color. The cake should bounce back when gently pressed.
I had 2 half sheet trays, so I alternated them in the oven, and each around took about 7 minutes. But if you only have one tray, subsequent rounds baked starting on a hot trays might take less time.
Alternatively, if you have full sheet trays, you can bake 2 rounds on a sheet at a time.
Remove the cakes from the tray immediately and let them cool somewhere else. (No carry over cooking from the hot tray.)
You can’t stack the cakes until they are completely cooled, but they only take like 10 minutes to fully cool. So you can shingle them for more space after your third round or so.
You should have 11 rounds total, but I think it’s possible to get more/less depending on your scoop size.
Make crumbs for garnish:
Once all the layers are baked, turn off the oven, open the door, and fan it a few times to cool it off quickly.
Choose your ugliest layer, and put it back in the (still turned off) slightly cooled oven, and let it toast in the residual heat until it darkens and turns crispy. Blitz it into crumbs.
Frosting & Assembly
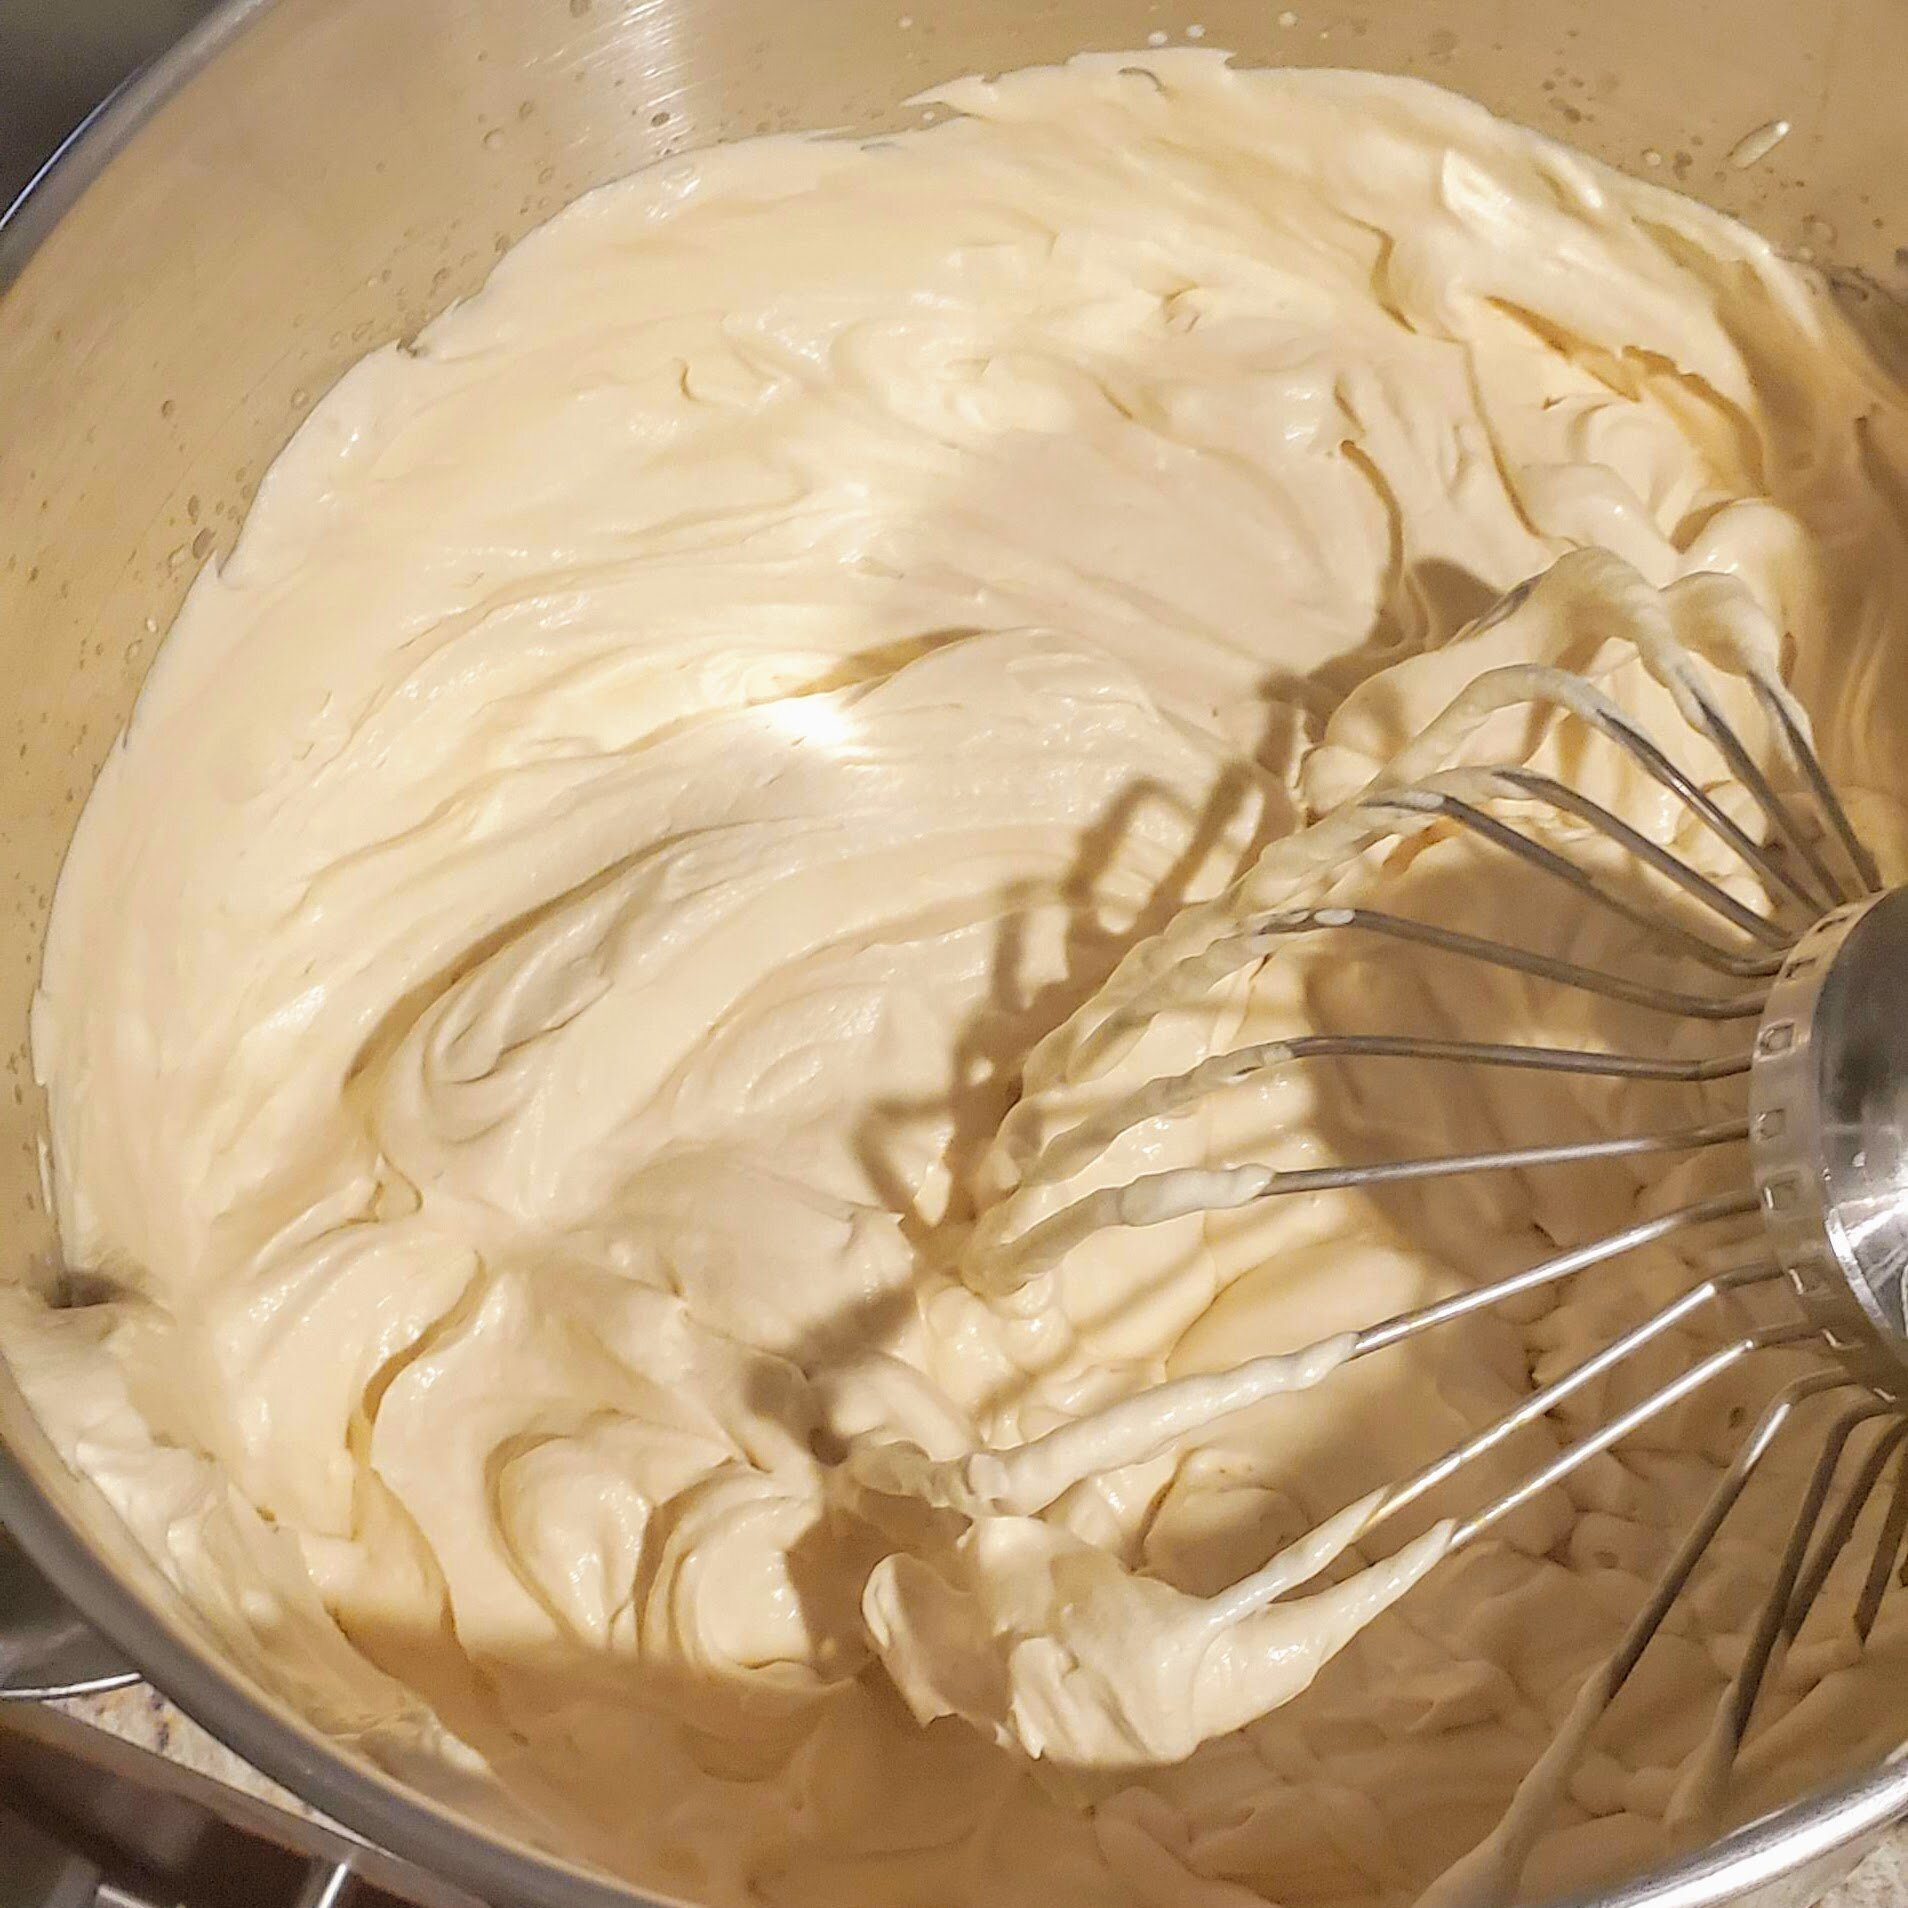
In a stand mixer with the paddle attachment, paddle together until homogenous:
1 14-ounce can dulce de leche (from above)
118 mL burnt honey (from above; this leaves you a tiny bit extra/accounts for loss when transferring etc)
3/4 tsp kosher salt
Stream in until smooth:
3/4 cup heavy cream
Store the frosting base in the fridge/chill until cold, along with a clean bowl and whisk.
When ready to assemble, whip to soft peaks:
5 1/4 cups heavy cream
Stream in chilled frosting base (from step 3), and whip to soft peaks again.
As long as it can hold a mound, it’s good to go. Careful not to overwhip because you think the cream won’t hold, because the manipulation/spreading and all that risks breaking your cream during assembly, especially if it’s a little warm in the room. Soft peaks that whole a nice dollop is good.
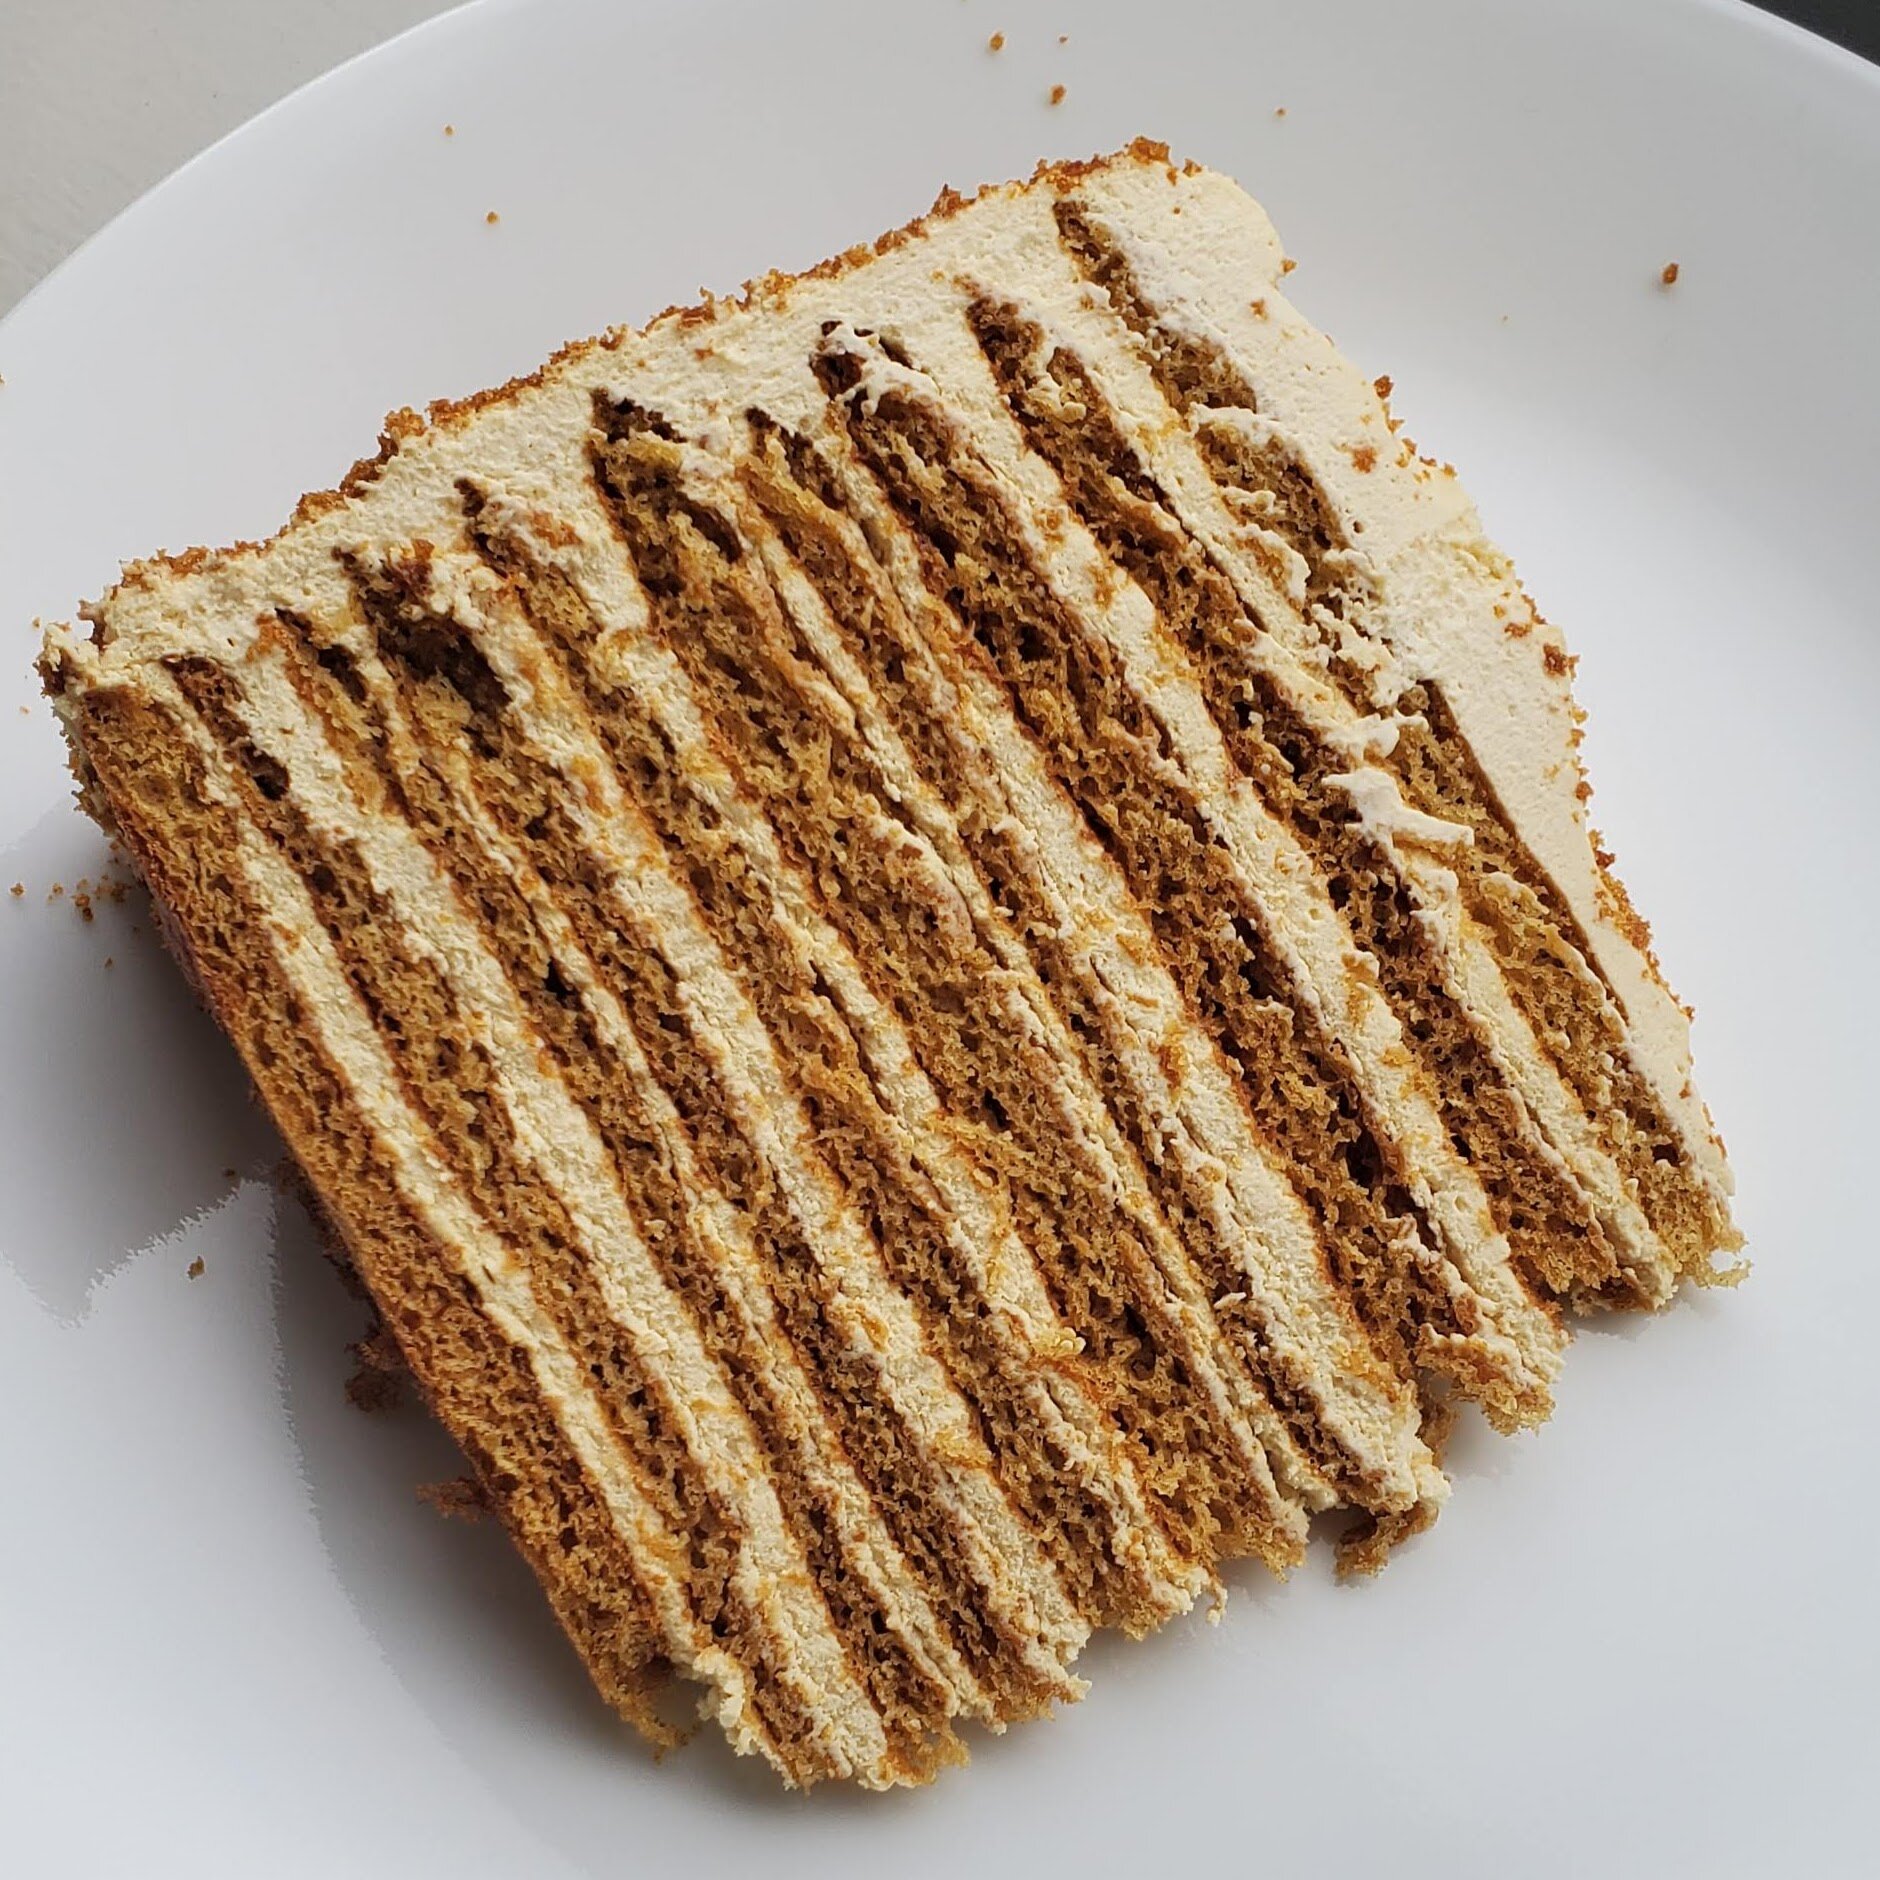
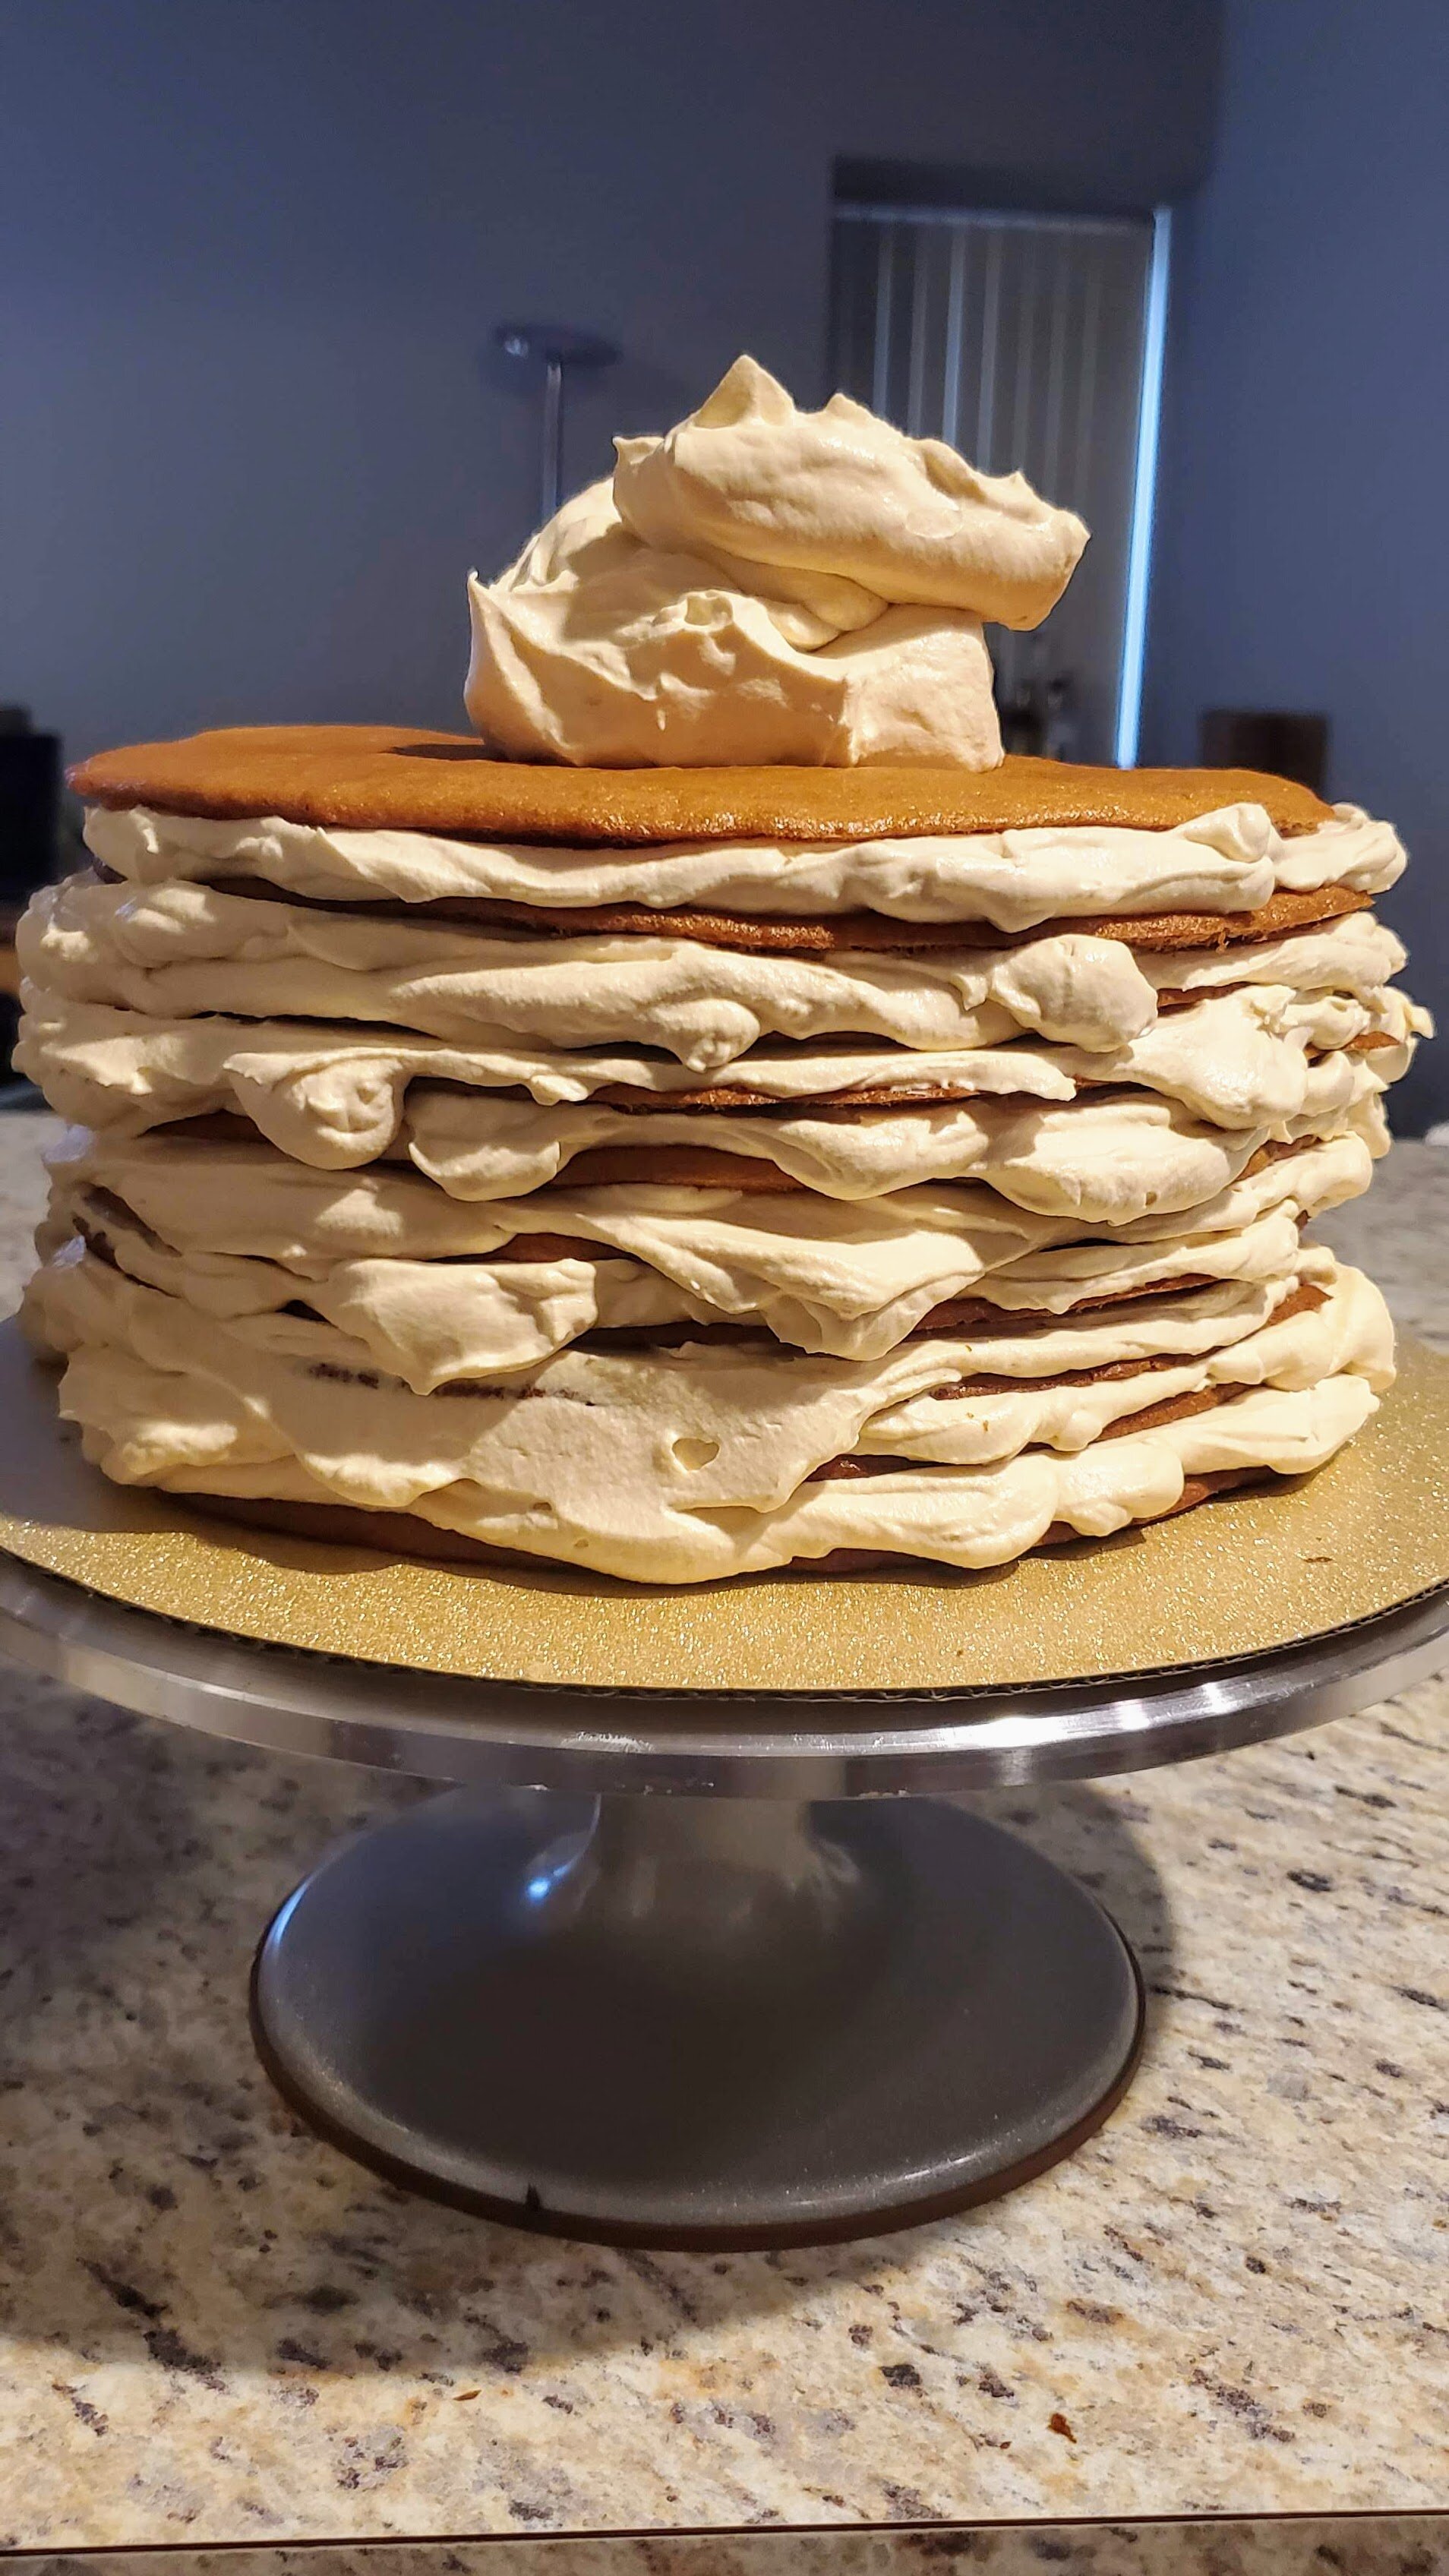
Assemble by putting about 150g (or 1 cup worth) of cream between each layer of cake.
Spread an even layer of cream, all the way to the edges, a little over the edges if possible, like a regular cake.
The idea is to have equal parts cream and cake.
Smooth out the sides, pushing all the overflowing icing into all the nooks and crannies.
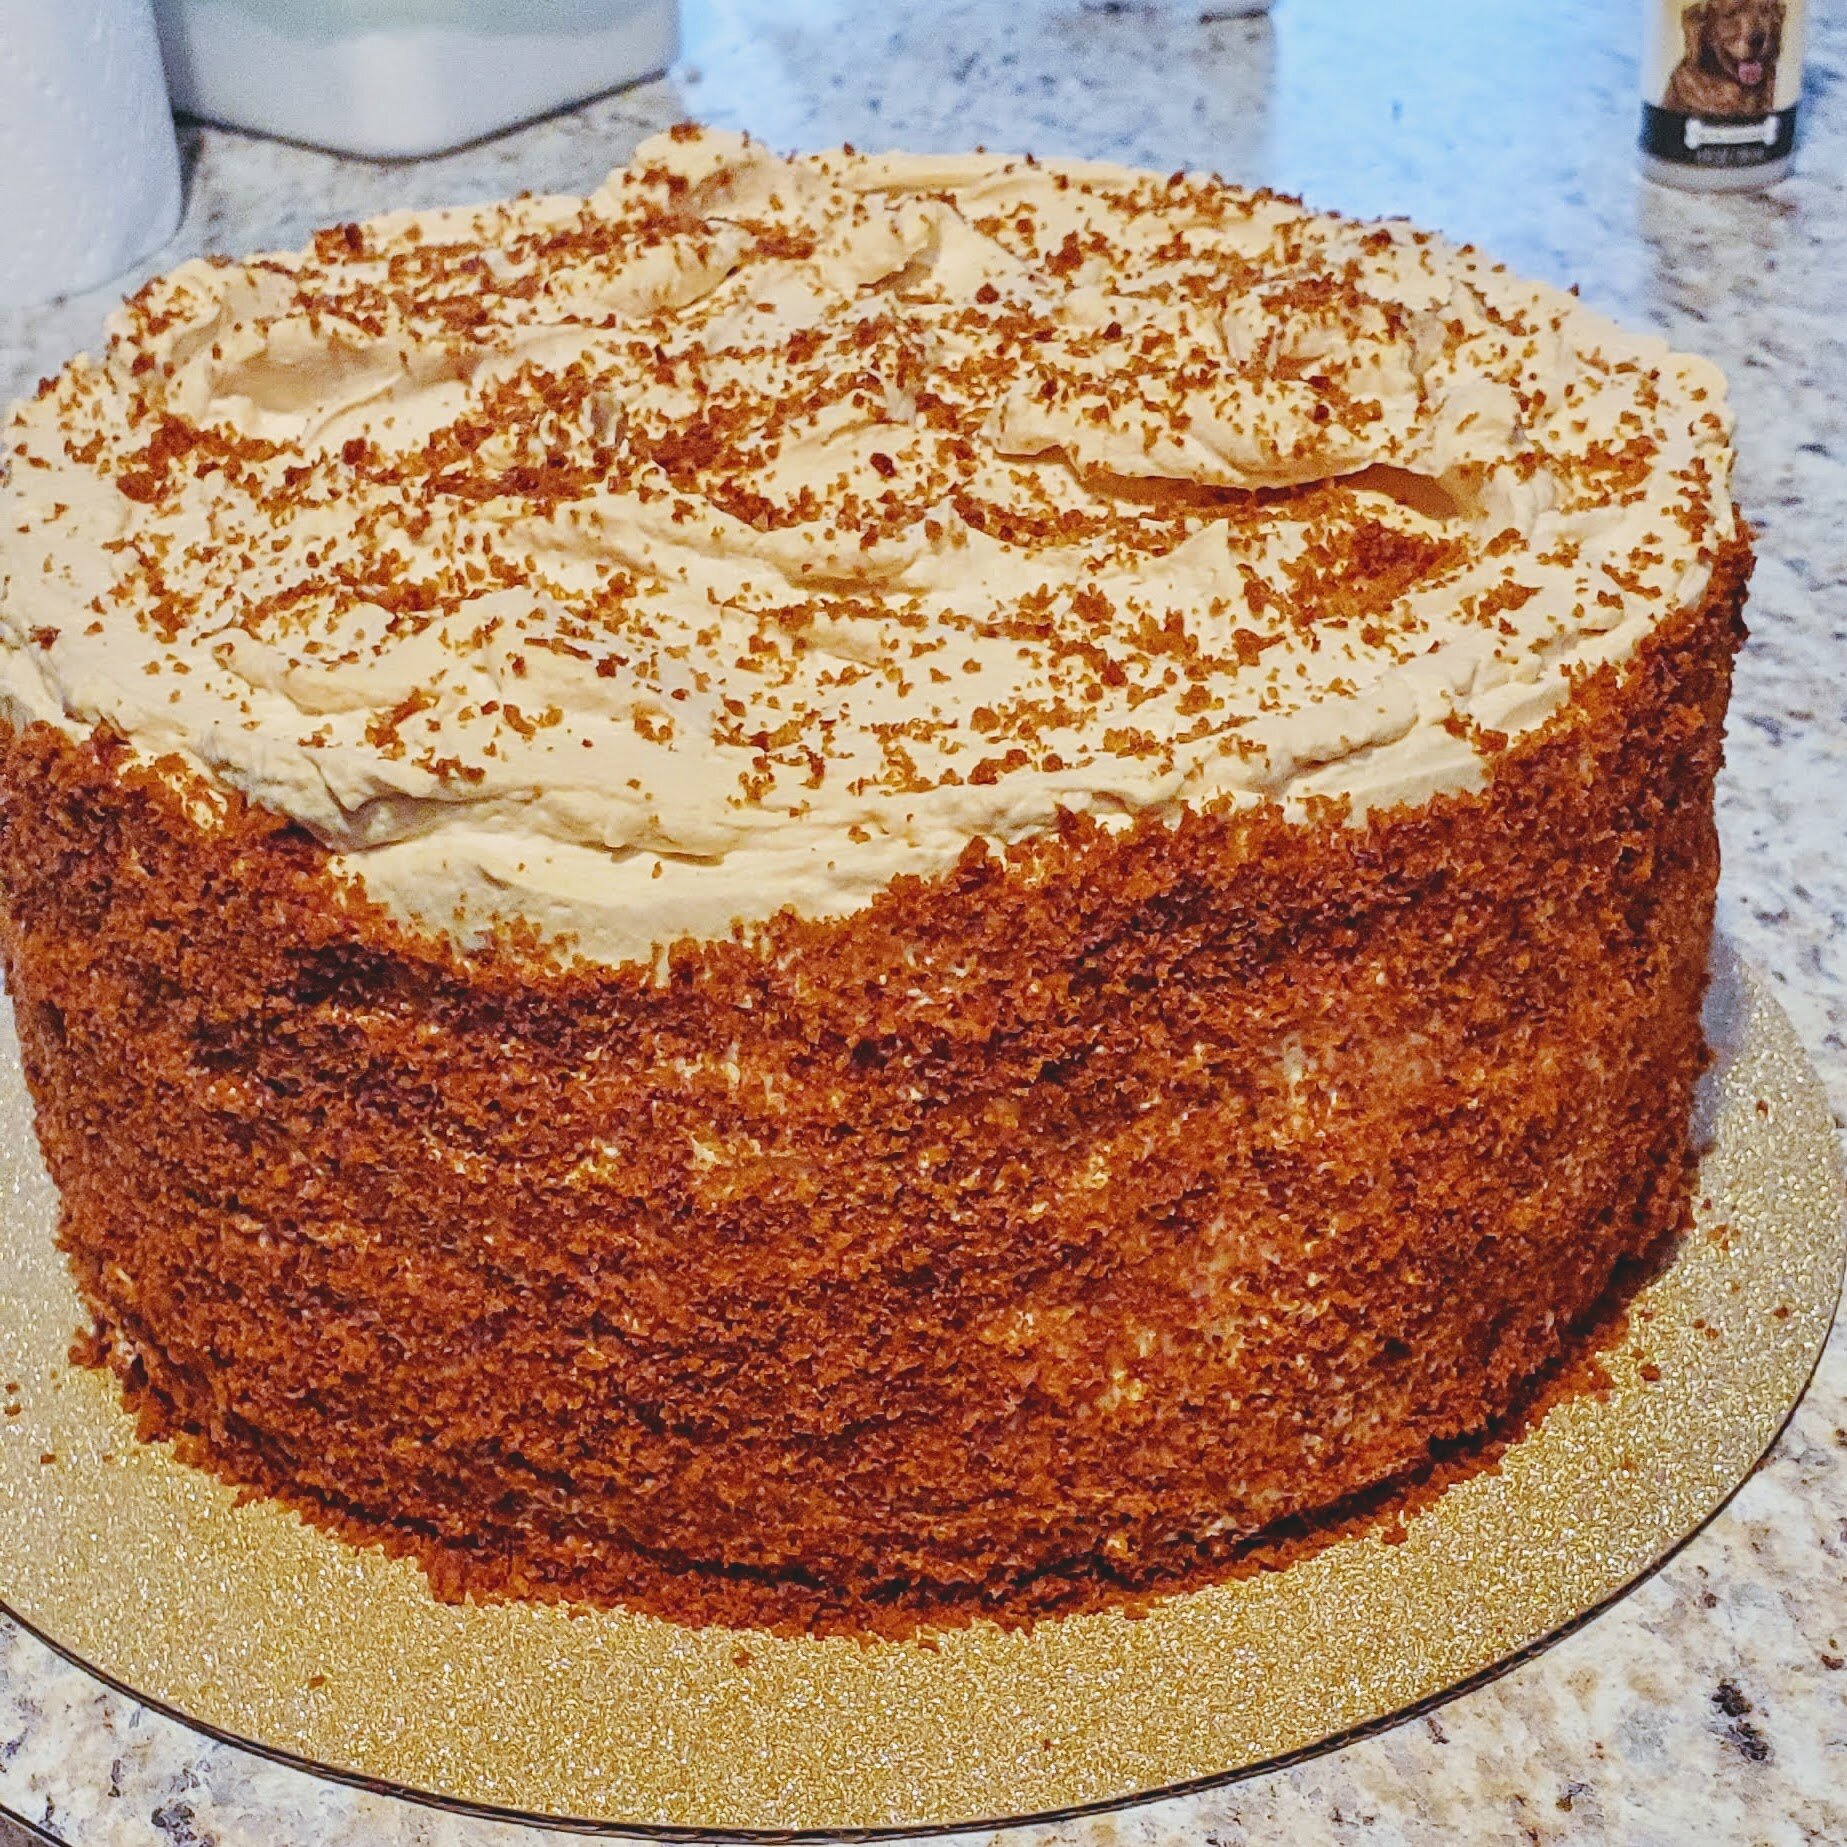
Gently push the crumbs (from above) onto the sides, scooping up what falls, until the sides are completely covered.
One layer’s worth of crumbs is almost exactly the amount necessary to cover the entire cake :mindblown: I think I had like a tablespoon left.
Decorate the top rustically, like with dollops and swirls or something. Add a sprinkling of leftover crumbs on top for garnish.
Chill the cake overnight. The cake can’t be eaten same-day, apparently, no matter how fast you are at baking.
I wonder if it means you have to wait a full 24 hours? Like if you make it at 11pm, can you eat it for breakfast the next day?
Notes
The verdict: This is a very good cake. After a full day in the fridge, the cake softens from the frosting, and the frosting sets slightly denser, yet still remains creamy. It reminds me of an Asian sponge cake, just with darker flavors. Like most Asian snacks, it’s also a little subtle, making you continue to go back for bite after bite to get another taste of that flavor.
I included a lot of notes in the instructions for myself, though I don’t know if I’d make this again. Maybe it’ll be long enough in the future that I’d appreciate my notes. I’m certainly glad I tried it. It’s worth the effort!
Even as a person who doesn’t love the flavor of honey, I liked this cake. The frosting tasted a lot like honey, which made me worried. But all together, it makes something greater than the sum of its parts. Truly remarkable.
I really wish I put more batter for each layer. The layers I did toward the end with a heaping 1/3 cup turned out much better.